Designing an off-grid solar system gives you the freedom of energy independence, but it requires careful planning and a solid understanding of your power needs. Since you are fully responsible for your power production with no grid to fall back on, it is critical to design a system that can reliably meet your energy demands 24/7, even during periods of bad weather. This guide will walk you through the essential steps to design a system tailored to your specific needs.
Understanding the Core Components
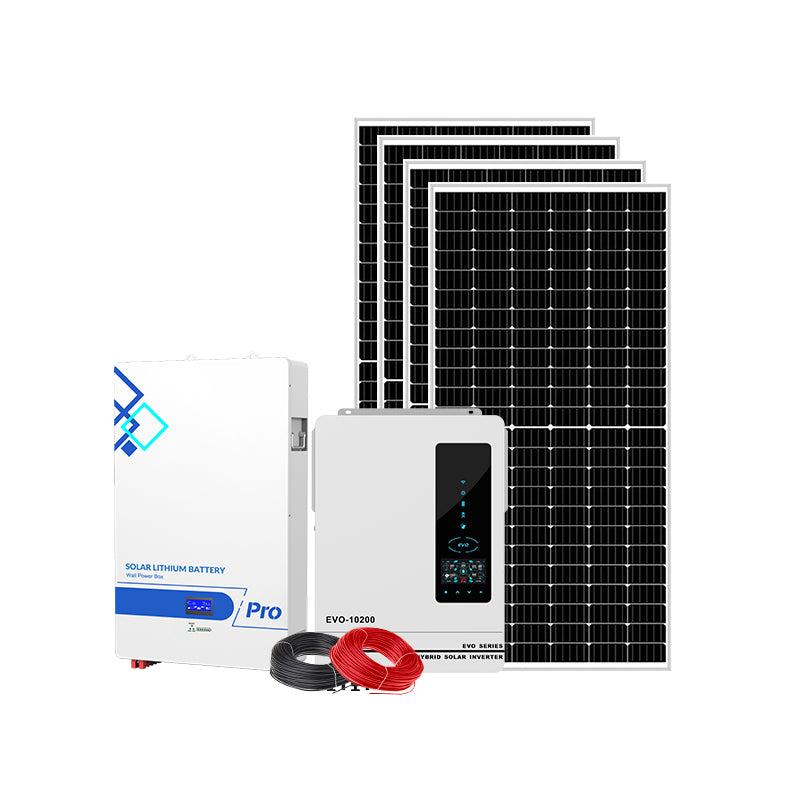
An off-grid solar power system is composed of several key components working together. According to Off Grid Solar Power 2022-2023, there are four main components in a simple system. Understanding these is the first step in your design journey.
- Solar Panels: These convert sunlight directly into direct current (DC) electricity. They are the energy-producing heart of your system.
- Battery Bank: The battery bank stores the excess energy generated during the day for use at night or on cloudy days. This is an essential component for any off-grid setup.
- Inverter: An inverter's job is to convert the DC electricity from your solar panels and batteries into alternating current (AC) electricity, which is the type used by most standard household appliances.
- Solar Charge Controller: This device is placed between the solar panels and the battery bank. It regulates the voltage and current coming from the panels to prevent the batteries from overcharging, which improves safety and extends battery life.
- Balance of System (BOS): This is a catch-all term for the miscellaneous but crucial items needed to connect everything, including wiring, fuses, circuit breakers, connectors, and mounting hardware.
Step 1: Calculate Your Energy Needs (Load Calculation)
The most critical part of designing any off-grid system is accurately calculating how much energy you will require per day. This determines the size of every other component in your system. As advised by sources like Euro Inox, you should start by listing all the electrical appliances you plan to power.
- List Your Appliances: Create a comprehensive list of every device you will run, from refrigerators and lights to laptops and phone chargers.
- Find the Wattage: Note the power consumption in watts (W) for each appliance. This is usually found on a nameplate label on the device. If you can't find it, you can use a wattmeter to measure actual consumption.
- Estimate Daily Usage: For each appliance, estimate how many hours it will run per day.
-
Calculate Watt-Hours (Wh): Multiply each appliance's wattage by its daily hours of use to find its daily energy consumption in Watt-hours (Wh).
Formula: Power (W) × Time (h) = Energy Consumption (Wh) - Calculate Total Daily Energy Needs: Sum the Wh values for all your appliances to get your total daily energy requirement.
- Determine Peak Power Demand: Add up the wattage of all appliances that you might run simultaneously. This total is your peak power demand, which is crucial for sizing your inverter correctly.
Step 2: Sizing Your System Components
With your energy needs calculated, you can now determine the appropriate size for your system's major components.
Battery Bank Sizing
Your battery bank must be large enough to store sufficient energy to power your loads when the panels are not producing power. A guide from ResidentialSolarPanels.org suggests that for a reliable continuous power supply, careful setup is crucial.
- Factor in System Voltage: First, decide on a system voltage. While 12V may work for very small systems, a 24V or 48V system is more efficient and cost-effective for residential power needs, as it allows for smaller, less expensive wiring.
- Account for Inefficiency: Energy is lost during charging and discharging. To compensate, increase your daily Wh total by 5% for lithium batteries or 20% for lead-acid batteries.
- Days of Autonomy: Decide how many consecutive days you want your system to run without any sun (days of autonomy). For residential systems, 1-2 days is a common target to balance cost and reliability. Multiply your adjusted daily energy need by your desired days of autonomy.
- Consider Depth of Discharge (DoD): To prolong battery life, you should not fully drain them. Lithium batteries can typically be discharged to 80-90% (0.8-0.9 DoD), while a 50% DoD (0.5 DoD) is recommended for deep-cycle lead-acid batteries.
-
Calculate Required Capacity: Use the following formula to find the necessary battery capacity in Amp-hours (Ah):
Battery Capacity (Ah) = Total Watt-hours / (System Voltage x Depth of Discharge)
Remember that environmental factors matter. As Green Coast points out, battery storage capacity can be significantly reduced in freezing conditions, which may require you to increase your battery bank size.
Solar Panel Array Sizing
Your solar array must be large enough to fully recharge your battery bank while also powering your daytime loads.
- Find Peak Sun Hours: The key variable is the number of "peak sun hours" for your location, which is a measure of the average solar intensity you receive. This is different from hours of daylight. You can find this data from resources like the National Renewable Energy Laboratory (NREL). Use the figure for the worst month of the year to ensure year-round power.
-
Calculate Required Wattage: Divide your total daily energy consumption (Wh) by the number of peak sun hours.
Solar Array Wattage (W) = Daily Energy Consumption (Wh) / Peak Sun Hours (h) - Add a Safety Margin: It's wise to oversize your array by about 20-25% to account for real-world inefficiencies like dust on panels, wire losses, and natural panel degradation over time.
- Determine Number of Panels: Divide the total required wattage by the wattage of the individual solar panels you plan to buy to determine how many you need.
Inverter Sizing
The inverter must be able to handle both your peak load and the system's voltage.
- Match Peak Demand: The inverter's continuous power rating (in watts) should be slightly higher than your calculated peak power demand.
- Check Surge Capacity: Ensure the inverter's surge rating can handle the initial startup demand of power-hungry appliances like refrigerators or pumps.
- Match Voltage: The inverter's DC input voltage must match your chosen battery bank voltage (e.g., 12V, 24V, or 48V). Its AC output voltage and frequency must also match your region's standard (e.g., 120/240V at 60Hz in the U.S.).
Charge Controller Sizing
The charge controller must be able to handle the full output current from your solar array at your system's voltage.
-
Calculate Maximum Current: Find the maximum current (amperage) from your solar array by dividing its total wattage by the system voltage.
Max Current (Amps) = Total Solar Panel Wattage / System Voltage - Apply a Safety Factor: Multiply this result by a safety factor of 1.25 (or 1.30) to account for potential spikes in solar intensity. Choose a charge controller with an amp rating equal to or greater than this final number.
- Choose the Right Type: According to Green Coast, a PWM (Pulse Width Modulation) controller is sufficient if your solar array and battery bank have the same voltage. If they differ, an MPPT (Maximum Power Point Tracking) controller is necessary and more efficient. For most systems, an MPPT controller is recommended for its superior performance.
Step 3: Planning Your Installation
Once you have designed your system and selected your components, proper planning is essential for a smooth and safe installation.
Optimizing Panel Placement
Effective panel placement is crucial for maximizing energy production. According to Euro Inox, you should consider latitude, seasonal sun patterns, and obstructions.
- Orientation: In the Northern Hemisphere, panels should face due South. In the Southern Hemisphere, they should face due North.
- Tilt Angle: For optimal year-round performance, set the tilt angle of your panels equal to your location's latitude. You can also adjust it seasonally (steeper in winter, shallower in summer) for higher efficiency.
- Avoid Shading: Ensure your proposed location is free from obstructions like trees, chimneys, or other buildings that could cast a shadow on the panels, especially during peak sun hours (typically 9 am to 3 pm).
Create a Wiring Diagram
Before you begin the physical installation, it is highly recommended to create a detailed electrical diagram. As noted by Solar Estimate, these diagrams serve as a blueprint for your installation and are often a required part of the permit application process.
By following these steps, you can confidently design an off-grid solar system that is robust, reliable, and perfectly suited to grant you true energy independence. As this guide from Complete Guide to Designing and Installing an Off-Grid Solar Power Station suggests, following a real-world, step-by-step process is the key to successfully building your own autonomous power station.


Leave a comment
All comments are moderated before being published.
This site is protected by hCaptcha and the hCaptcha Privacy Policy and Terms of Service apply.