
Installing a solar energy system is a significant upgrade for any home, but it shouldn't come at the expense of your roof's integrity. Your roof is the primary shield against the elements, and any penetrations made to mount solar panels must be perfectly sealed. Improperly sealed penetrations are a leading cause of roof leaks, which can lead to costly structural damage and negate the financial benefits of your solar investment. This guide details the professional techniques for creating durable, waterproof seals on asphalt shingle roofs that will last for decades.
Understanding the Challenge of Roof Penetrations
Sealing a hole on an asphalt shingle roof isn't as simple as applying a dab of sealant. The nature of the material and the dynamics of water flow require a more robust solution to ensure a long-lasting, leak-proof seal.
Why Asphalt Shingles Require Special Attention
Asphalt shingles are the most common residential roofing material due to their affordability and ease of installation. They are designed in overlapping layers to shed water effectively. However, this layered composition, combined with their flexibility and reaction to temperature changes, means any penetration point can easily become a vulnerability if not handled correctly. Simply drilling a hole and filling it with sealant is a recipe for failure, as the sealant will eventually dry, crack, and pull away from the shingle, creating a direct path for water.
The Anatomy of a Roof Leak
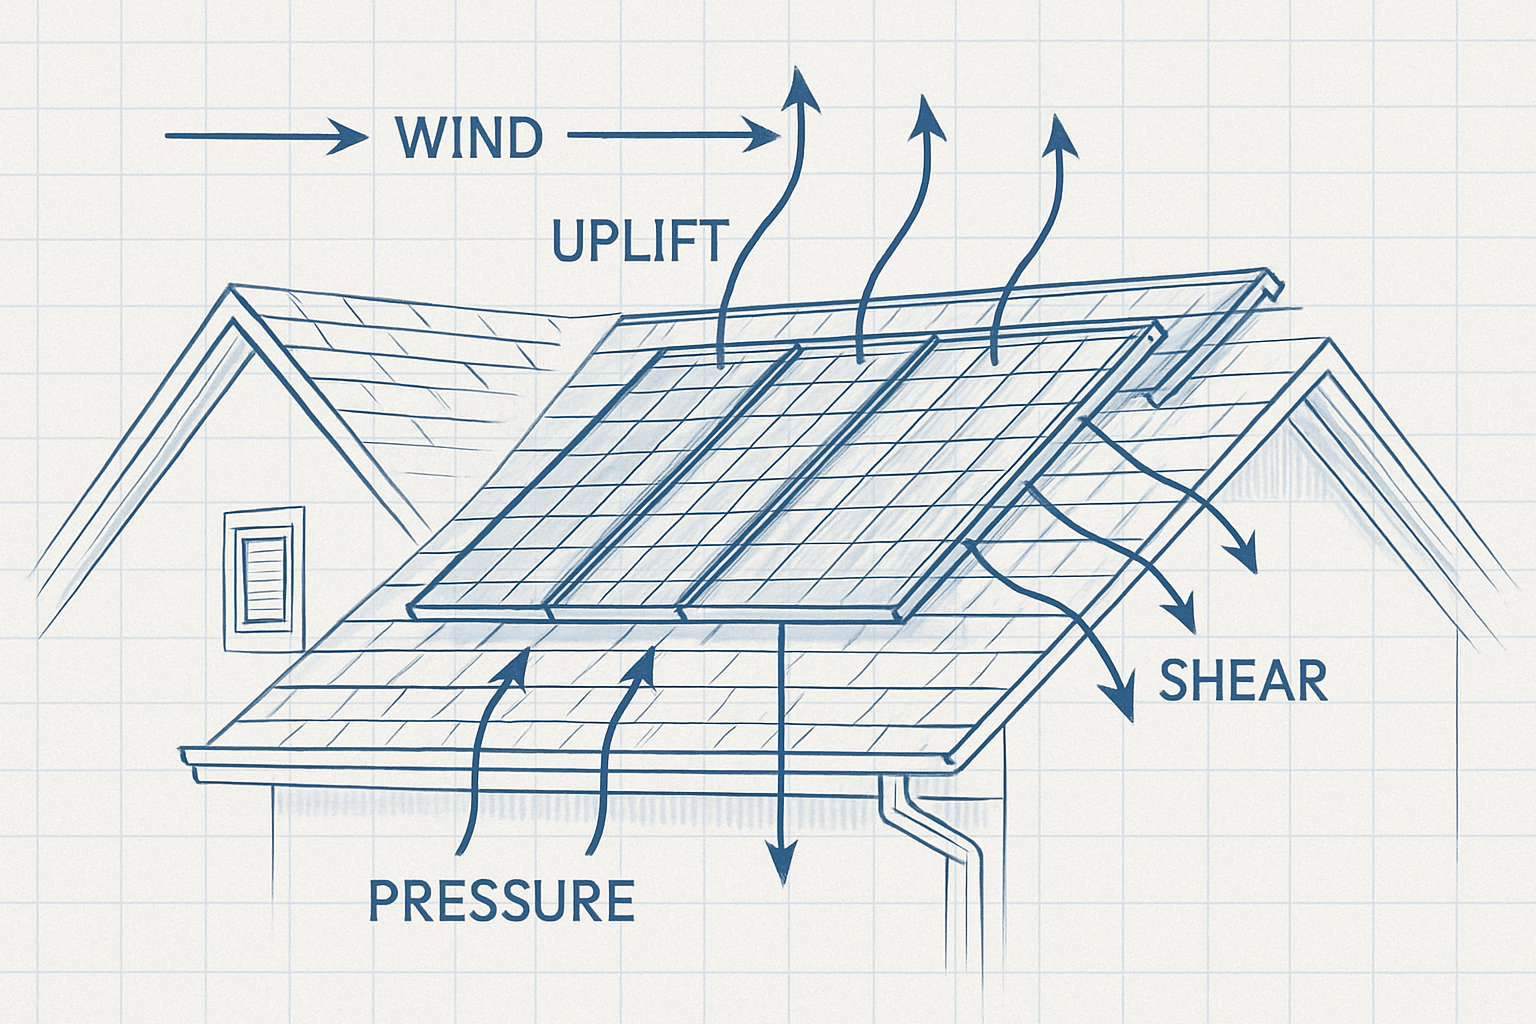
Water is persistent and can find its way through the smallest of openings, often through capillary action or when driven by wind. A common mistake is relying solely on sealants as the primary defense. While high-quality sealants are a necessary component, they should be considered a secondary layer of protection. The primary defense against water intrusion is a properly installed mechanical flashing system, which physically diverts water away from the penetration point.
Choosing the Right Flashing System
The success of sealing asphalt shingle penetrations hinges on selecting the right type of flashing and the best materials for the job. The goal is a system that matches the lifespan of both your roof and your solar panels.
Mechanical Flashing: The Gold Standard
Mechanical flashing is a physical barrier, typically made of metal, that integrates with the shingle layers to channel water away from the penetration. For solar installations, common types include L-foot and standoff flashing systems. These systems consist of a metal plate that slides under the shingle course above the penetration and over the course below, an elevated attachment point for the solar racking, and a rubber gasket to create a tight seal. This method maintains the roof's natural water-shedding properties.
Materials Matter: Aluminum vs. Galvanized Steel
The material used for flashing plays a critical role in its longevity. The two most common choices for solar applications are aluminum and galvanized steel.
| Material | Pros | Cons |
|---|---|---|
| Aluminum | Lightweight, corrosion-resistant, malleable, and cost-effective. | Can corrode if it comes into direct contact with alkaline materials like cement or mortar without a protective coating. |
| Galvanized Steel | Strong, rigid, and highly resistant to rust due to its zinc coating. A good choice for high-wind areas. | Heavier than aluminum and can be more expensive. |
The Role of High-Quality Sealants
Sealant should be applied in the pilot hole before the lag bolt is driven in and sometimes to bond the flashing to the roof deck. This acts as a final barrier against moisture. It's crucial to use a high-quality, UV-stable sealant designed for outdoor and roofing applications, such as a tripolymer or polyurethane-based product that remains flexible over time. Avoid using silicone-based sealants on asphalt shingles as they may not adhere well long-term.
The Step-by-Step Installation Process
Proper installation is a meticulous process that requires attention to detail at every step. Rushing the job or cutting corners will almost certainly lead to problems in the future.
Locating Rafters and Preparing the Area
The solar mounts must be anchored directly into the roof rafters, not just the roof decking, to handle the weight and wind load of the solar array. Use a stud finder to locate the center of the rafters and mark the attachment points. Before drilling, use a pry bar to carefully break the seal of the shingle above where the flashing will be placed. This should be done carefully to avoid damaging the shingles, especially in cold weather when they can be brittle.
Installing the Flashing Correctly
The installation sequence is critical for creating a waterproof seal.
- Drill a pilot hole into the center of the rafter.
- Fill the pilot hole with an appropriate roofing sealant.
- Carefully slide the metal flashing into position, ensuring the top edge is well underneath the shingle course above it. The bottom of the flashing should rest on top of the shingle course below.
- Drive the lag bolt through the flashing's attachment point and into the rafter, tightening it to compress the gasket and create a seal. Do not over-tighten, as this can damage the shingle or flashing.
- Ensure the flashing lies flat and does not disrupt the natural path for water to flow down the roof.
Post-Installation Checks and Best Practices
After installing all mounts, conduct a visual inspection. Check that all flashings are correctly layered and flat. Look for any shingles that may have been damaged during the process. A professional installer will leave the roof in better condition than they found it, ensuring all penetrations are secure and the surrounding area is clean.
Long-Term Performance and Maintenance
A properly sealed roof is the foundation for a high-performing solar energy system. Ensuring the installation is sound from the start prevents future issues and protects your investment.
The Importance of System Integration
A secure, leak-free roof is the first step toward achieving optimal solar and storage performance. The long-term reliability of your entire energy system depends on the quality of every component, from the mounting hardware to the batteries and inverters. As detailed in the Ultimate Reference for Solar Storage Performance, a well-integrated system maximizes efficiency and energy independence. This integration begins with a flawless installation that protects your home's structure.
Inspection and Upkeep
While a properly flashed system requires minimal maintenance, it's wise to conduct annual visual inspections. After severe weather events like heavy wind or hail, check the roof around the solar array for any signs of uplifted flashing or damaged seals. Catching minor issues early can prevent major problems down the line.
A Foundation for Energy Independence
Sealing asphalt shingle penetrations is a critical task that demands precision and the right materials. Relying on mechanical flashing as the primary barrier, supported by high-quality sealants, is the only professional approach. By following these best practices, you ensure your solar installation will not compromise your roof's integrity. This protects your home from water damage and provides a secure foundation for a reliable solar energy system that will serve you for decades.
Frequently Asked Questions
Can I just use sealant instead of flashing?
No. Sealant alone is not a durable, long-term solution for waterproofing roof penetrations. It degrades over time when exposed to UV rays and temperature fluctuations, eventually cracking and failing. Mechanical flashing is essential as it physically diverts water, providing a permanent barrier that doesn't rely on chemical adhesion.
How long should roof flashing for solar panels last?
High-quality flashing should last for the entire lifespan of the solar panel system, which is typically 25 years or more. The material, such as aluminum or galvanized steel, is chosen for its durability and resistance to corrosion to match the longevity of the solar components.
What are the signs of a failing roof penetration seal?
The most obvious signs are water stains on the ceiling or walls inside your home, directly below the solar array. Other indicators can include dampness or mold in the attic space, peeling paint near the penetration area, or visible damage and curling of the shingles around the solar mounts on the roof.

Leave a comment
All comments are moderated before being published.
This site is protected by hCaptcha and the hCaptcha Privacy Policy and Terms of Service apply.