In any DIY solar installation, there's a critical moment of truth just before you connect your panels to the charge controller or inverter. A simple mistake here—reversing the positive and negative wires—can instantly destroy expensive equipment. How do you confidently verify that every connection is correct and safe? The answer lies in using the right testing tools. Polarity and continuity testers are indispensable for any DIY solar installer, providing the assurance needed to power up your system safely.
Why Polarity and Continuity Testing is Non-Negotiable
Skipping electrical testing is a gamble with high stakes. Proper verification of polarity and continuity is a foundational step that protects your investment, ensures safety, and guarantees your system operates as expected. Adhering to standards, such as those outlined by the International Electrotechnical Commission (IEC), is crucial for the reliability and safety of a solar installation.
The Dangers of Reversed Polarity
Reversed polarity occurs when the positive wire is connected to a negative terminal and vice versa. This seemingly small error can have catastrophic consequences. If a PV string's polarity is reversed, it can cause severe equipment damage, reduce or halt energy generation, and even create a fire hazard. In a multi-string setup, a single reversed string can create a short circuit, potentially damaging the PV modules permanently by blowing the bypass diodes. This makes polarity testing an essential safety check before energizing any part of your system.
The Importance of Solid Continuity
Continuity refers to a complete, unbroken path for electricity to flow. A continuity test verifies the integrity of your wiring from the panels to your components. Poor continuity, caused by loose connections, damaged wires, or faulty connectors, creates high resistance. This resistance leads to voltage drops, significant power loss, and hot spots that can cause wires to overheat or arc, posing a serious fire risk. Regular testing helps identify these issues before they compromise your system's efficiency and safety.
A Foundational Step for System Performance
Ultimately, meticulous wiring and testing are the bedrock of a high-performing solar energy system. Flawless electrical connections ensure that every watt generated by your panels reaches your batteries and inverter. This attention to detail is fundamental to achieving the long-term efficiency and reliability discussed in comprehensive guides on optimizing solar storage performance. By verifying every connection, you ensure your system is not only safe but also configured to deliver its maximum potential output.
Types of Testers for Your Solar Toolkit
Choosing the right tool depends on your needs, but every DIY installer should have at least one reliable method for checking their work. The investment in a quality tester is minor compared to the cost of replacing a damaged inverter or charge controller.
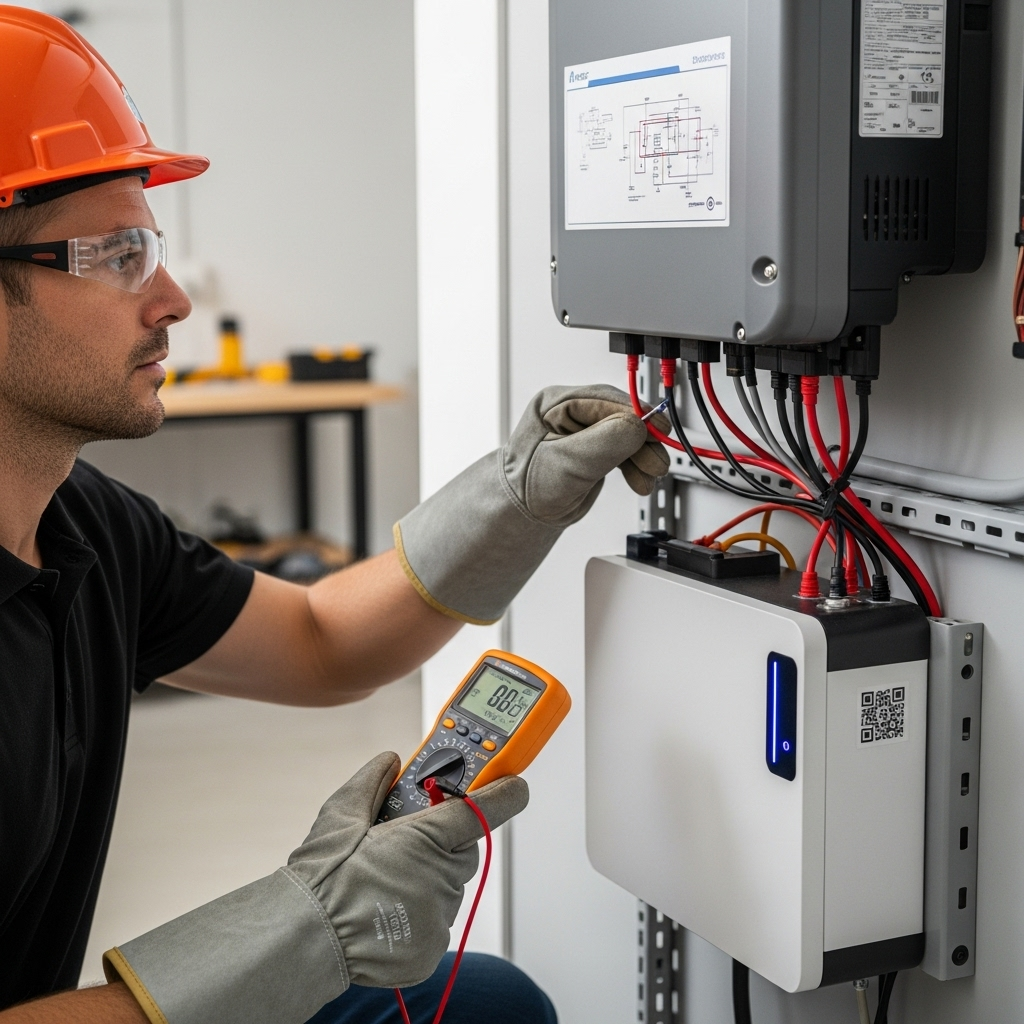
The Essential Multimeter
A digital multimeter (DMM) is arguably the most versatile and valuable tool for any solar project. It can measure DC voltage, current, and resistance. For solar work, its primary functions are verifying DC voltage to confirm polarity and checking resistance to confirm continuity. Modern DMMs are user-friendly and provide precise digital readouts, removing the guesswork from electrical diagnostics. According to a report from the International Energy Agency, the growth of PV technology necessitates robust and reliable installation practices, and a multimeter is a key tool in achieving that.
Dedicated PV Polarity Testers
For those who prefer a more specialized tool, dedicated PV polarity testers offer simplicity and speed. These devices are designed for one primary job: to quickly confirm that the polarity of a connection is correct. They typically use simple visual indicators, like green and red LEDs, to show a correct or reversed connection. While less versatile than a multimeter, their focused design can streamline the installation process and reduce the chance of human error.
Continuity-Only Testers
A basic continuity tester is a simple and affordable tool that indicates whether a complete electrical circuit exists. It typically signals a closed circuit with a light or an audible beep. While useful for quickly checking for broken wires, it cannot test for voltage or polarity. Therefore, it should be considered a supplementary tool rather than a primary diagnostic device for solar installations.
A Practical Guide: How to Test Your PV System
Before performing any tests, always prioritize safety. Wear appropriate Personal Protective Equipment (PPE), including insulated gloves and safety glasses, as PV circuits can be live during daylight and cannot always be de-energized.
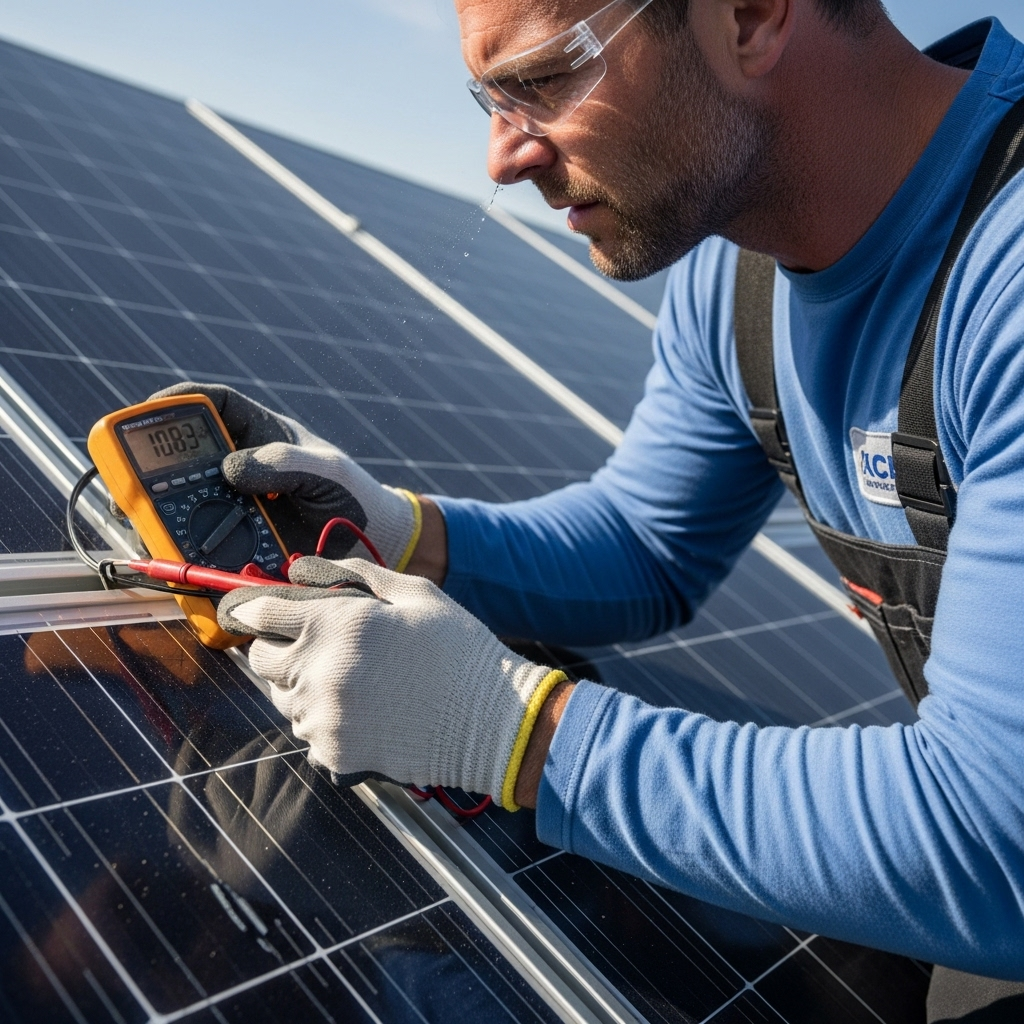
Testing a Single Solar Panel
To check a panel's polarity, set your multimeter to the DC voltage setting, ensuring its range is higher than the panel's open-circuit voltage (Voc). Connect the multimeter's red probe to what you believe is the positive connector and the black probe to the negative. If the multimeter displays a positive voltage reading (e.g., +36V), your polarity is correct. A negative reading (e.g., -36V) indicates the polarity is reversed.
Verifying Series and Parallel Strings
For panels connected in series, the total voltage of the string should be the sum of the individual panel voltages. Testing the Voc at the end of the string confirms all panels are correctly wired. Verifying the polarity of the final positive and negative leads is crucial before connecting them to a combiner box or charge controller. As noted in guidance from the National Renewable Energy Laboratory, proper system integration begins with verifying these fundamental electrical parameters.
Checking Continuity from Panel to Controller
To test for continuity, the system must be completely powered down and disconnected. Set your multimeter to the continuity or resistance (Ω) setting. Test each length of wire (positive and negative lines separately) by placing one probe at each end of the wire. A continuous beep or a reading of very low resistance (near zero ohms) confirms the wire has good continuity.
Comparing Key Features for the Right Choice
The right tool simplifies your workflow and enhances safety. This table breaks down the capabilities of each tester type to help you decide which is best for your toolkit.
| Feature | Digital Multimeter (DMM) | Dedicated Polarity Tester | Basic Continuity Tester |
|---|---|---|---|
| Polarity Testing | Yes (via DC Voltage) | Yes (Primary Function) | No |
| Continuity Testing | Yes (via Resistance/Continuity Mode) | Some models | Yes (Primary Function) |
| Voltage Measurement | Yes | No | No |
| Versatility | High | Low | Low |
| Ease of Use | Moderate | High | High |
| Price Range | $$ - $$$ | $ - $$ | $ |
Final Checks for a Safe and Efficient System
Electrical testing is not an optional step in a DIY solar installation; it is a critical procedure that ensures safety, protects your equipment, and maximizes system performance. Whether you choose a versatile digital multimeter or a simple, dedicated tester, the goal is the same: to verify every connection before you apply power. Investing a small amount of time and money in the right testing tools provides peace of mind and safeguards your much larger investment in achieving energy independence.
Disclaimer: This article is for informational purposes only and does not constitute professional electrical or financial advice. Always consult with a qualified professional and adhere to local electrical codes and regulations for your solar installation.
Frequently Asked Questions
Can I use a cheap analog multimeter?
While possible, a digital multimeter (DMM) is highly recommended. DMMs provide a clear, numerical readout, are more accurate, and often include features like auto-ranging and a dedicated continuity beep, making the process much easier and less prone to error for DIY solar wiring.
What voltage rating should my tester have?
Your tester's DC voltage rating must exceed the maximum open-circuit voltage (Voc) of your solar array string. For most residential systems, a multimeter rated for 600V or 1000V DC is a safe and standard choice. Always check your panel and string specifications first to be certain.
Do I need to test polarity every time I connect a panel?
Yes. It is a critical safety habit. Even if connectors are color-coded or keyed, manufacturing errors or mistakes in attaching extension cables can occur. Verifying the polarity of each panel and each string before making the final connection to your charge controller or inverter is the best practice to prevent equipment failure.
Leave a comment
All comments are moderated before being published.
This site is protected by hCaptcha and the hCaptcha Privacy Policy and Terms of Service apply.