Setting up a 12V solar system for your RV or campervan is a significant step toward energy independence. It opens up a world of off-grid possibilities. Yet, a few common planning errors can lead to poor performance, damaged components, or even safety hazards. A well-designed system provides reliable power, while a poorly planned one becomes a source of frustration. This overview details seven costly mistakes in RV solar layouts and provides straightforward fixes to ensure your system is efficient, safe, and dependable from day one.
Mistake 1: Undersizing Wires and Fuses
One of the most frequent yet dangerous errors is using wires that are too small for the electrical current they need to carry. This oversight can cripple your system's performance and create serious risks.
The Dangers of Inadequate Wiring
When a wire is too thin for the amperage flowing through it, it creates resistance. This resistance causes voltage drop, meaning your batteries won't charge as efficiently and your appliances may not receive the power they need. More critically, this resistance generates heat, which can melt the wire's insulation and create a significant fire hazard. Proper wiring is a foundational element of a safe and efficient campervan solar system.
The Right Way to Size Your Wires
Wire thickness is measured by its American Wire Gauge (AWG), where a lower number indicates a thicker wire. To select the correct size, you must consider two factors: the maximum amperage that will pass through the wire and the total length of the wire run (both positive and negative). Using a wire size calculator is highly recommended. Always choose a thicker wire if you are between sizes to build in a margin of safety and efficiency.
| Current (Amps) | Max Wire Length for <3% Voltage Drop (12V) |
|---|---|
| 10A | 10 AWG @ 15 ft / 6 AWG @ 30 ft |
| 20A | 8 AWG @ 15 ft / 4 AWG @ 30 ft |
| 30A | 6 AWG @ 15 ft / 2 AWG @ 30 ft |
| 50A | 4 AWG @ 15 ft / 1/0 AWG @ 30 ft |
Fusing for Safety
Fuses and circuit breakers are non-negotiable safety devices. Their job is to protect your equipment by interrupting the circuit during an overcurrent event. Every positive wire connected to your battery's positive terminal must have a fuse, placed as close to the battery as possible. This prevents a short circuit from causing a fire. Ensure each fuse is rated correctly for the wire it protects and the maximum current of the connected device.
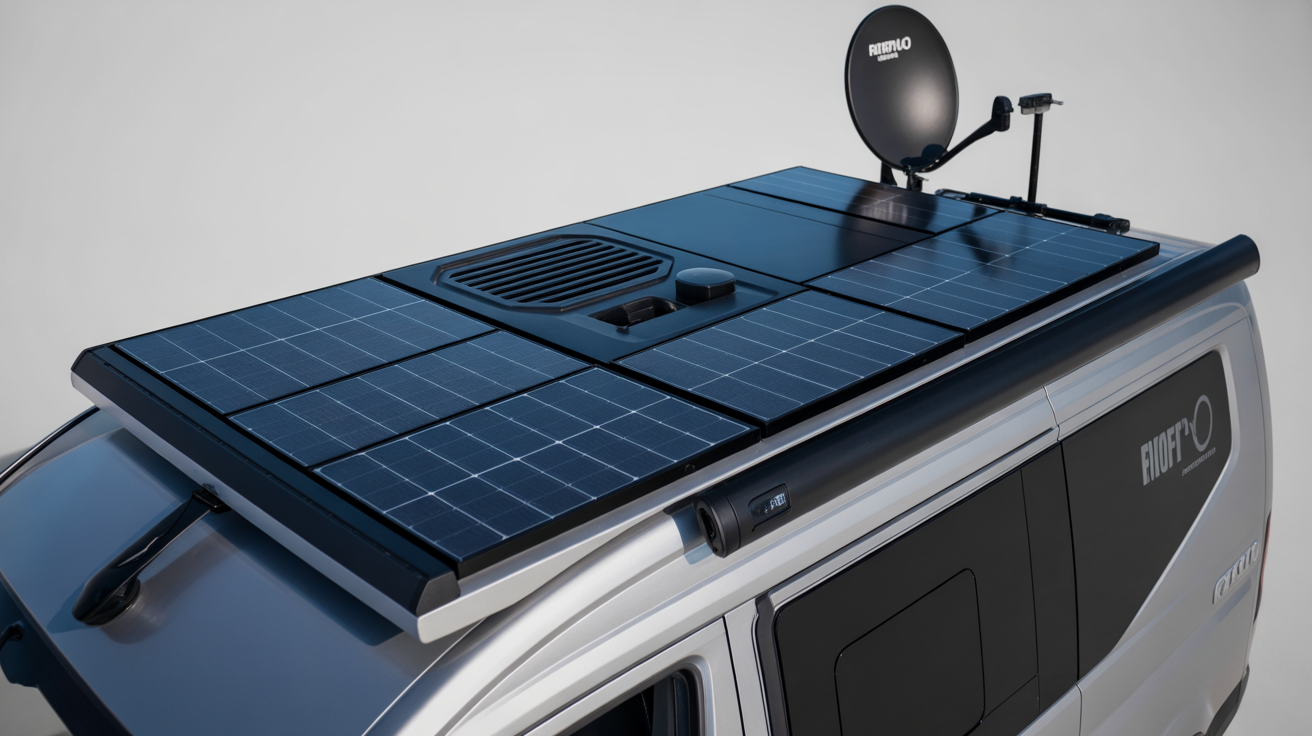
Mistake 2: Ignoring Panel Placement and Shading
The layout of your solar panels on the RV roof has a direct impact on their energy production. Simply finding space is not enough; strategic placement is crucial for maximizing your solar harvest.

The Impact of Partial Shading
Even a small shadow from a vent pipe or air conditioner can have a disproportionately large effect on your system's output. In a typical series-wired string of panels, if one cell is shaded, the output of the entire string can drop significantly. This is because the shaded cell acts like a bottleneck, restricting the flow of electricity for all the panels connected to it. Effective RV solar planning involves mapping out these potential obstructions before installation.
Strategic Panel Layout
Before drilling any holes, lay your panels on the roof to find the optimal configuration. Consider the path of the sun throughout the day and identify areas that will receive the most direct, unobstructed sunlight. Sometimes, using multiple smaller panels offers more layout flexibility than one or two large ones. According to a report from the International Energy Agency, system design elements like module layout are critical for maximizing output. As noted in the Technology Roadmap - Solar Photovoltaic Energy 2010, optimizing system parameters can substantially boost energy yield.
Series vs. Parallel Connections
How you wire your panels together also affects their performance in shade. Wiring panels in series increases voltage, which is good for long wire runs, but makes the array highly susceptible to shading. Wiring them in parallel keeps the voltage the same but adds the amperage. A parallel connection is more shade-tolerant, as a shaded panel will not affect the output of the others in the circuit. Many RV systems use a combination of series and parallel connections to balance voltage and shade tolerance.
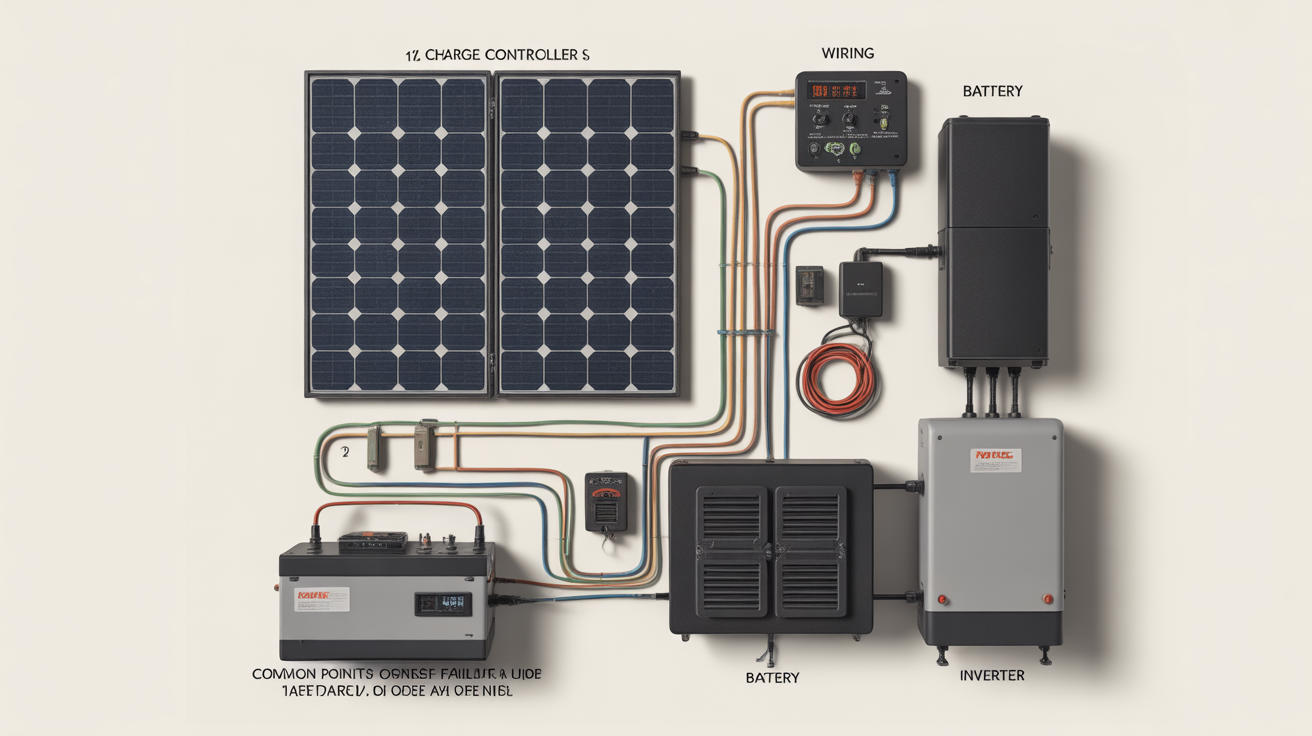
Mistake 3: Mismatching Components
A solar power system is an ecosystem where every component must work in harmony. Creating a system with mismatched parts is a common mistake that leads to inefficiency and potential equipment damage.
The Controller-Panel Mismatch
The solar charge controller is the brain of your system, regulating the power from the panels to the batteries. There are two main types: PWM (Pulse Width Modulation) and MPPT (Maximum Power Point Tracking). MPPT controllers are more advanced and can convert excess voltage into amperage, making them significantly more efficient, especially with panels wired in series for higher voltage. Pairing a high-voltage array with a basic PWM controller wastes a substantial amount of potential power.
Battery and Inverter Incompatibility
Your inverter converts 12V DC power from your batteries to AC power for household appliances. A powerful inverter can draw a very high current from the battery bank. If the batteries are not designed to handle such a high discharge rate, their voltage will sag, causing the inverter to shut down prematurely. This is a common issue with traditional lead-acid batteries. High-performance LiFePO4 (Lithium Iron Phosphate) batteries are better suited for this, as they can sustain a higher discharge current without significant voltage drop.
Mistake 4: Neglecting a Proper Energy Audit
Building a solar system without first understanding your specific power needs is like packing for a trip without knowing the destination. This oversight almost always results in a system that is either too small and frustrating or too large and expensive.
Guessing Your Power Needs
Many people buy a pre-packaged solar kit assuming it will meet their needs, only to find themselves running out of power. Your energy consumption is unique to your lifestyle and the appliances you use. A proper RV solar planning process begins with calculating this usage, not with shopping for panels.
How to Perform a Simple Energy Audit
An energy audit is a simple but critical calculation. Create a list of every 12V and AC device you plan to use. For each device, find its power consumption in watts and estimate how many hours you will use it per day. Multiply the watts by the hours to get the daily watt-hours (Wh) for each device. Sum the watt-hours for all devices to determine your total daily energy requirement. This number is the foundation for sizing your battery bank and solar array.
Mistake 5: Overlooking Battery Chemistry and Capacity
The battery bank is the heart of your off-grid system. Choosing the wrong type or size of battery is a costly error that impacts your system's performance and longevity.
Choosing the Wrong Battery Type
The two main battery chemistries for RVs are lead-acid (including AGM) and lithium (specifically LiFePO4). While lead-acid batteries have a lower upfront cost, they are heavier, have a shorter lifespan, and typically only allow you to use about 50% of their rated capacity. LiFePO4 batteries, on the other hand, are lighter, can last for thousands of cycles, and allow you to safely use 80-100% of their capacity. Their stable voltage output also improves the performance of your appliances.
Underestimating Battery Bank Size
Based on your energy audit, you can size your battery bank. A common mistake is failing to account for the usable capacity (Depth of Discharge or DoD). If your daily need is 1200 Wh, you would need a 200Ah lead-acid battery (12V x 200Ah x 50% DoD = 1200 Wh). However, a 100Ah LiFePO4 battery could meet the same need (12V x 100Ah x 100% DoD = 1200 Wh), saving both space and weight. Always size your battery bank to have at least enough capacity for one to two days of usage without any sun.
Mistake 6: Providing Poor Ventilation for Components
High-powered electronics like inverters and charge controllers generate a significant amount of heat during operation. Failing to provide adequate ventilation is a mistake that can shorten their lifespan and reduce their efficiency.
The Problem with Heat
Heat is the enemy of electronics. When a charge controller or inverter overheats, its internal protection circuitry will reduce its output to prevent damage. This process, known as thermal derating, means you are getting less performance from your expensive equipment. Sustained high temperatures can lead to premature component failure.
Best Practices for Component Placement
Install your charge controller, inverter, and other electronics in a location with plenty of airflow. A compartment that is too small or sealed off is not suitable. Mount components vertically on a non-flammable surface, leaving several inches of clear space around them. If necessary, install a small 12V fan to ensure active air circulation, especially in warmer climates.
Mistake 7: Skimping on System Monitoring
Without a proper monitoring system, you are essentially operating your power system blind. You have no accurate way of knowing how much energy is coming in, how much is going out, or the true health of your batteries.
Flying Blind with Your Power System
The simple voltage-based battery meters found on many RV control panels are notoriously inaccurate. They cannot provide a precise picture of your battery's State of Charge (SoC). This can lead you to unknowingly over-discharge your batteries, which is particularly damaging to lead-acid types, or leave you without power when you thought you had plenty.
The Value of a Battery Monitor
A quality, shunt-based battery monitor is an essential tool. It measures the actual current flowing in and out of your battery bank, giving you a highly accurate SoC reading, much like a fuel gauge in a car. It also provides valuable data on your current energy consumption and solar production. This information allows you to make informed decisions about your energy usage and helps protect your significant investment in your battery bank. As research from the U.S. Department of Energy highlights, real-time monitoring data is crucial for understanding and optimizing a PV system’s performance.
A Smarter Approach to RV Solar
Building a reliable RV 12V solar system is achievable when you avoid these common pitfalls. The process hinges on careful planning, starting with a thorough energy audit. From there, selecting correctly sized wires, fuses, and components is critical. Strategic panel placement, a well-matched battery bank, and proper ventilation all contribute to a system that performs efficiently and safely. By investing time in the design phase, you create a robust solar layout that provides the power you need for all your adventures, truly enabling the freedom of the open road.
Frequently Asked Questions
Can I mix different sizes of solar panels?
Mixing solar panels is possible but requires careful consideration. If wiring in parallel, the voltage of all panels should be very similar. If wiring in series, the amperage (specifically Imp) should be nearly identical. Mismatched panels can lead to significant power loss because the entire string's performance is often limited by the lowest-performing panel. According to the IEA, mismatched PV modules result in energy loss because interconnected modules are forced to operate at the same electrical condition.
How important is an MPPT controller for an RV system?
An MPPT charge controller is highly recommended for most RV solar systems. Its ability to maximize power extraction from the solar panels can result in up to 30% more energy harvest compared to a PWM controller, especially in cold weather or low-light conditions. This efficiency gain means faster battery charging and more available power, making it a worthwhile investment for anyone serious about off-grid energy.
How do I calculate the right wire size for my solar setup?
The best way to calculate the correct wire size is to use an online wire gauge calculator. You will need to input three key pieces of information: the maximum current (amps) that will flow through the wire, the total length of the circuit (from the power source to the device and back), and the system voltage (12V). Aim for a voltage drop of 3% or less to ensure optimal performance and safety.

Leave a comment
All comments are moderated before being published.
This site is protected by hCaptcha and the hCaptcha Privacy Policy and Terms of Service apply.