The difference between a functional energy storage system and a high-performance one often lies in the details of its wiring. Professional wiring is more than just connecting components; it's a systematic approach to maximize efficiency, ensure long-term safety, and guarantee the longevity of your investment. This approach moves beyond basic connections to focus on the technical nuances that extract every possible watt from your system.
Here, you will gain insights into advanced wire selection, professional connection techniques, and robust system protection strategies. These practices are fundamental to building a reliable and powerful energy storage solution that delivers peak performance day in and day out.
Foundational Principles of High-Performance Battery Wiring
Solid performance starts with a solid foundation. In energy storage systems, that foundation is the physical wiring that carries the power. Understanding the principles of wire selection and the impact of voltage drop is crucial for efficiency and safety.
Beyond Amps: Selecting the Right Wire Gauge and Type
Choosing the correct wire is not merely about meeting the minimum amperage requirement to prevent overheating. For peak performance, you must also consider minimizing voltage drop. Wires that are technically thick enough to handle the current safely can still be too thin for optimal efficiency, leading to wasted energy. Stranded copper wire is the preferred choice for battery systems due to its flexibility, which makes it resistant to vibrations and easier to route. The insulation type is also important; materials like THHN or XHHW are common choices for their durability and resistance to heat and moisture within conduits.
The Critical Role of Voltage Drop in System Efficiency
Voltage drop is a reduction in electrical potential along the path of a current. Think of it as electrical friction. The longer and thinner a wire, the more voltage is lost as heat, never reaching your inverter or appliances. A professional standard is to keep voltage drop below 3%, and ideally below 2%. Excessive voltage drop forces your inverter to work harder, can cause premature low-voltage shutdowns, and reduces the overall power output of your system. As detailed in guides on maximizing solar storage performance, even a small loss in voltage can significantly reduce the power delivered, impacting everything from charging speed to appliance operation.
| Current (Amps) | Distance (One-Way) | Recommended AWG |
|---|---|---|
| 50A | 10 feet (3 meters) | 6 AWG |
| 100A | 10 feet (3 meters) | 2 AWG |
| 150A | 10 feet (3 meters) | 1/0 AWG |
| 200A | 10 feet (3 meters) | 3/0 AWG |
Mastering Connections for Reliability and Safety
The quality of your connections is just as important as the quality of your wires. A poor connection introduces resistance, creating a bottleneck that generates heat, wastes energy, and poses a significant safety hazard. Professional installation focuses on creating secure, low-resistance pathways for electricity.
Crimping and Terminations: The Professional Standard
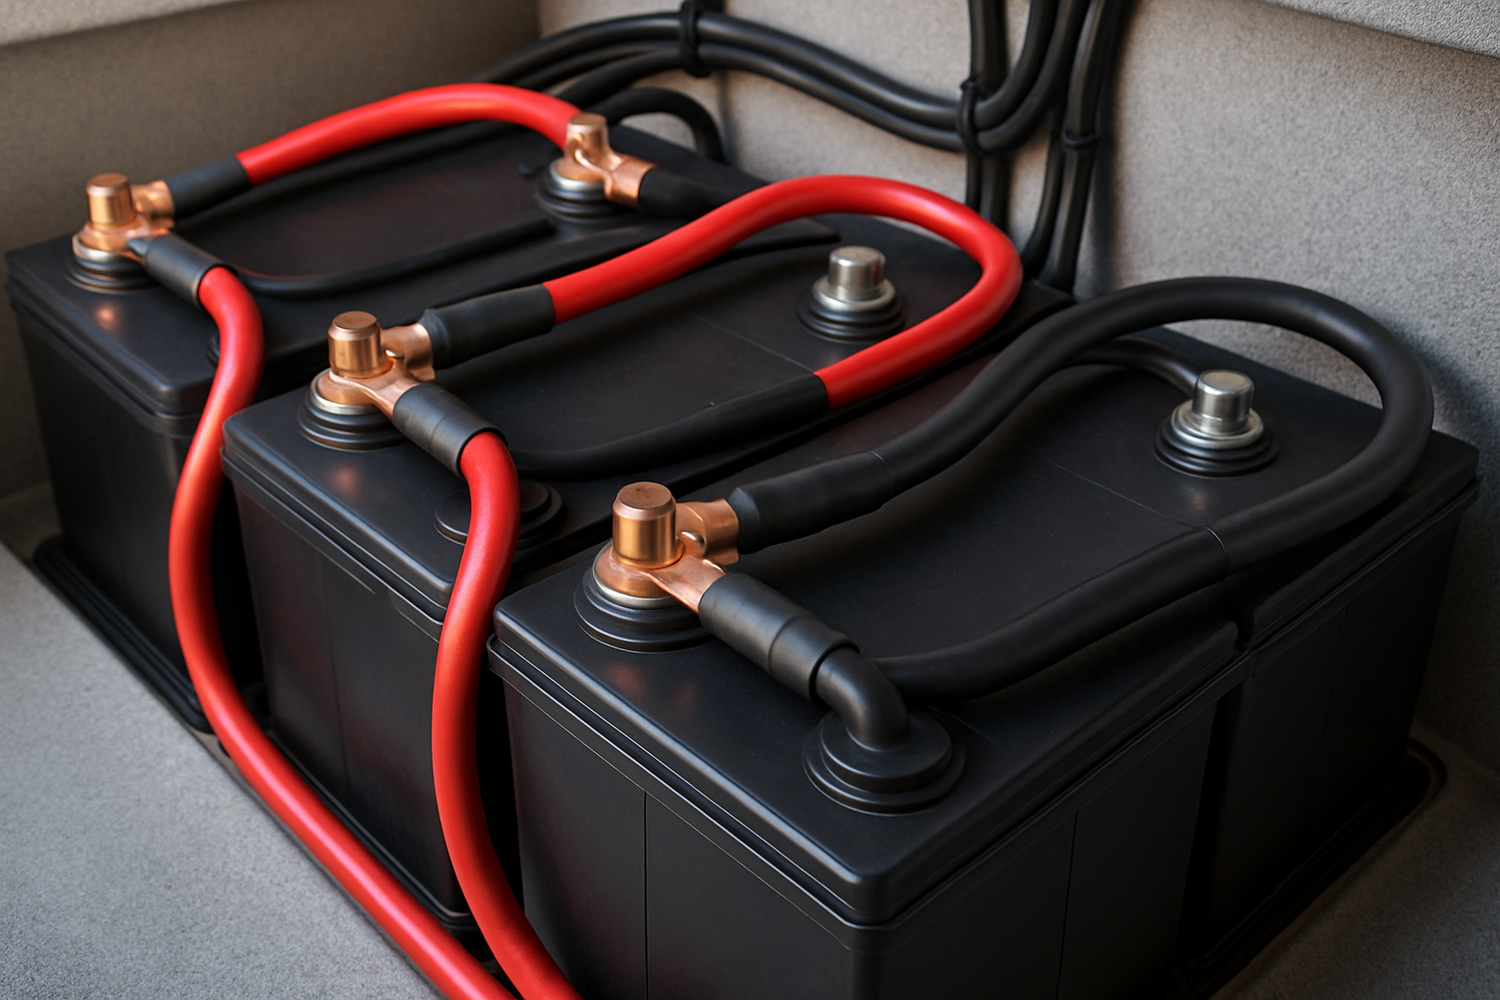
For high-current DC connections, a properly executed crimp is superior to soldering. Using a hydraulic or high-leverage hex crimper creates a gas-tight cold weld between the wire and the lug. This method provides maximum conductivity and mechanical strength. The process involves stripping the wire to the correct length, inserting it fully into a properly sized copper lug, and applying sufficient force with the correct crimping die. To finish, adhesive-lined heat shrink tubing should be applied over the connection point. This seals out moisture and oxygen, preventing corrosion that could degrade the connection over time.
Busbars vs. Direct Connection: Scaling Your System
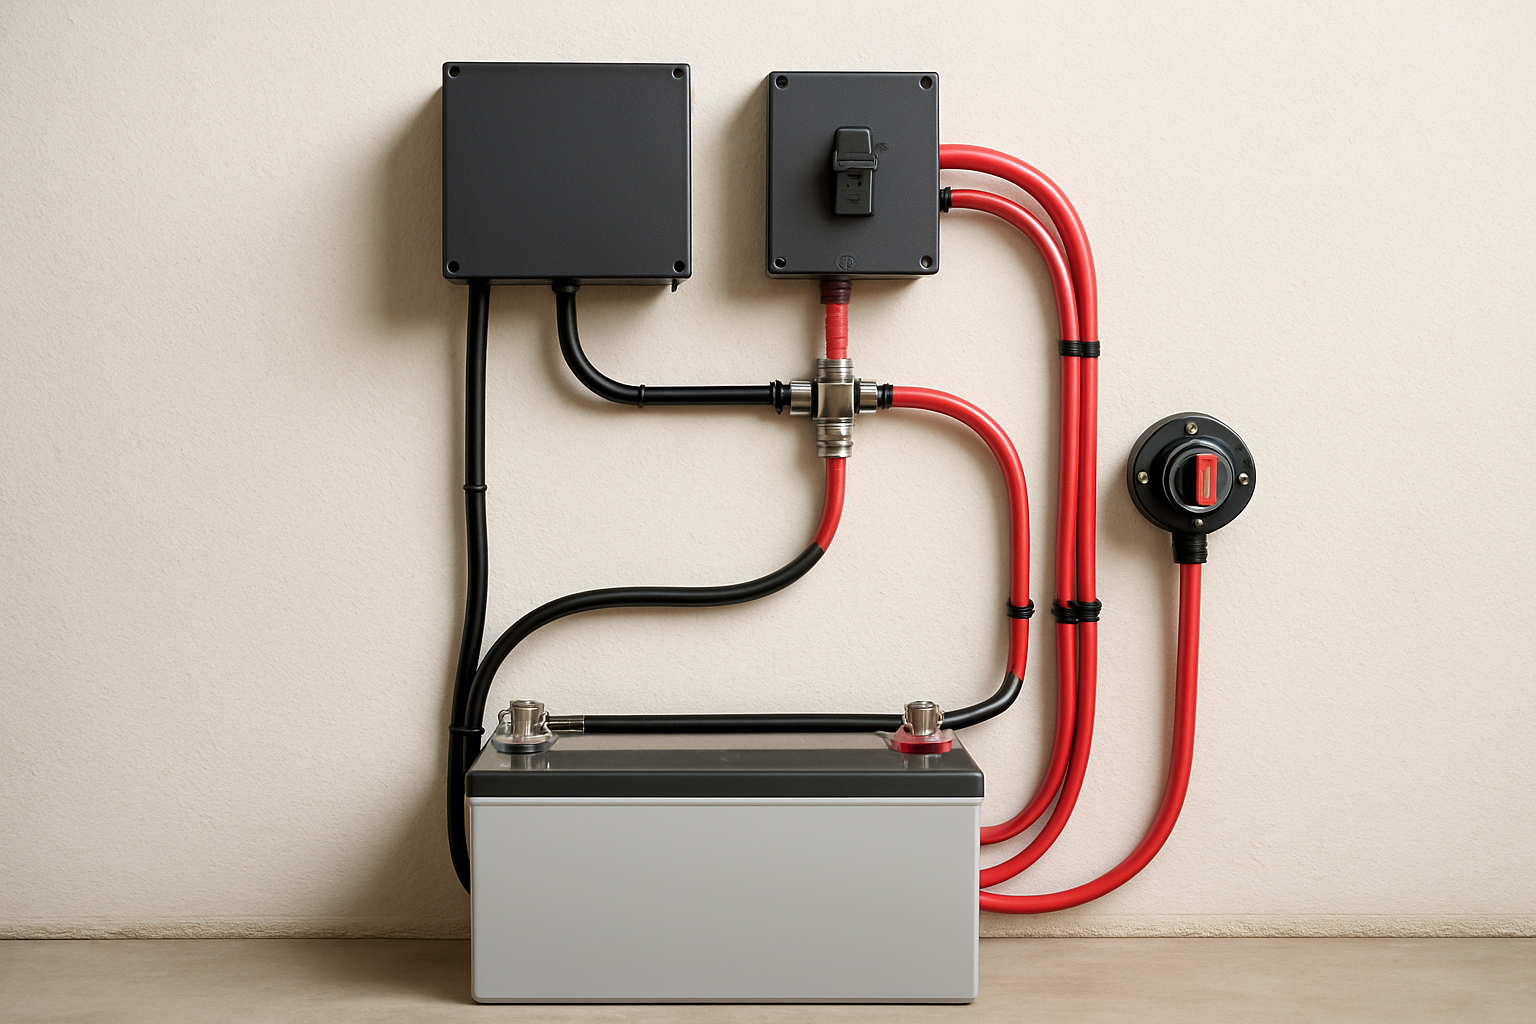
When a system involves multiple parallel battery strings or several high-power loads, busbars are an essential component. These solid metal bars provide a common, high-conductivity distribution point for multiple cables. Using busbars results in a much cleaner and more organized installation than connecting multiple cable lugs to a single terminal. This approach simplifies maintenance, makes it easier to expand the system later, and ensures a more even distribution of current between parallel battery strings.
Advanced Protection Strategies for Longevity
A robust protection scheme is non-negotiable. It safeguards your equipment from fault conditions like short circuits and overloads, protecting your investment and ensuring safety. Advanced strategies involve more than just a single main fuse; they require a layered approach.
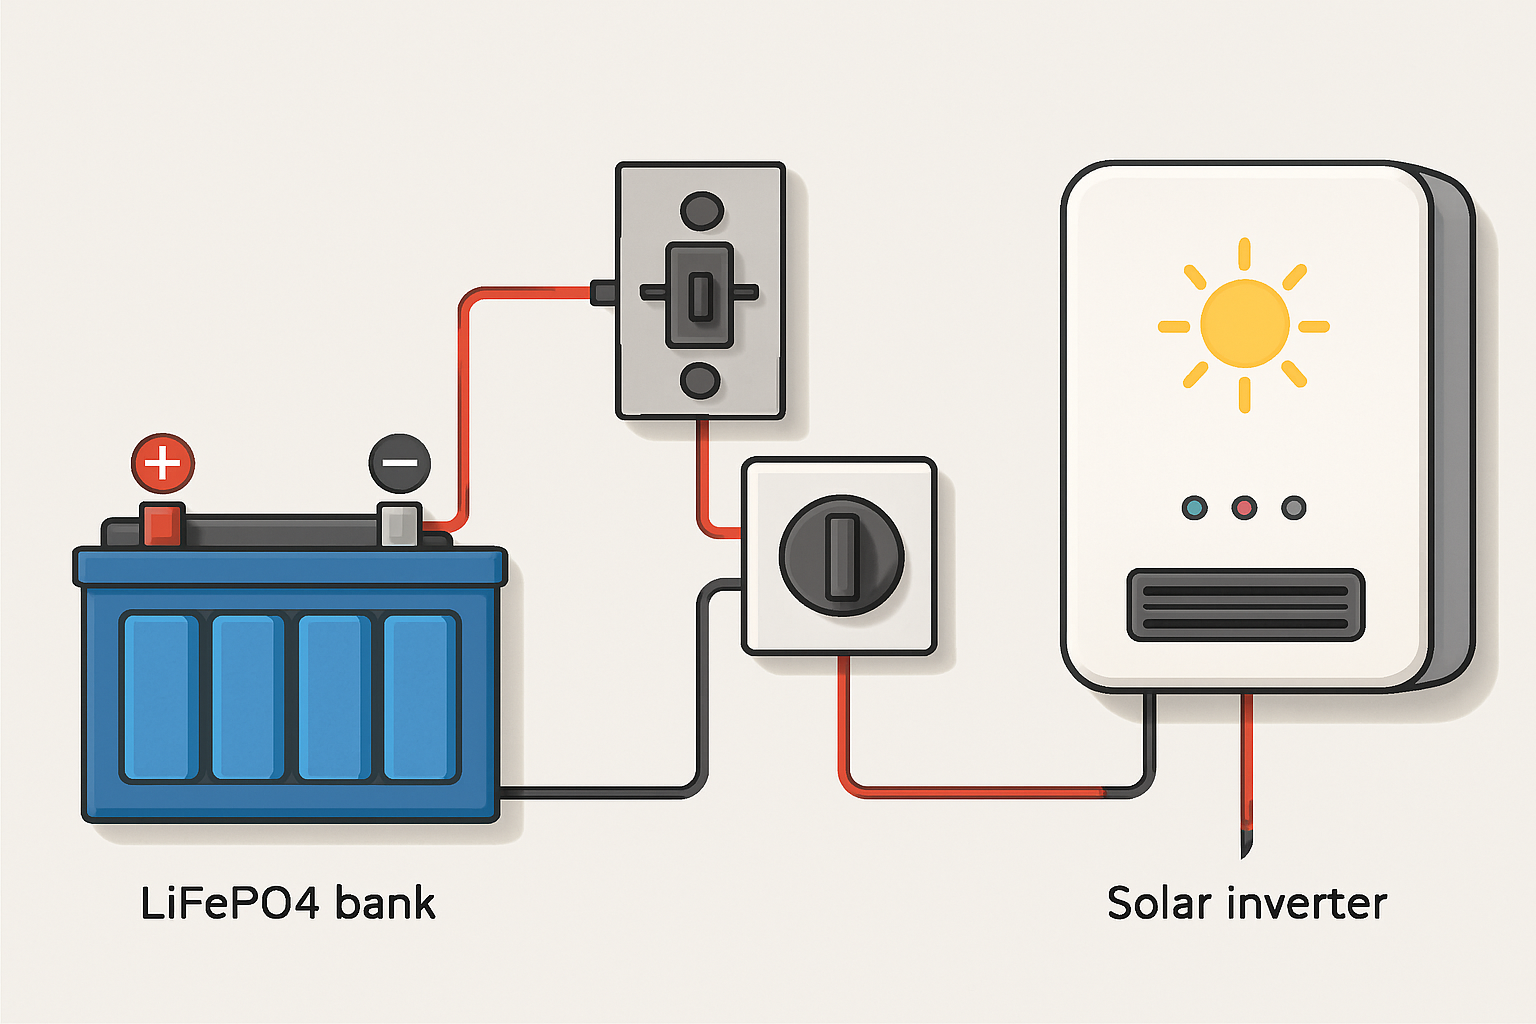
Strategic Placement of Fuses and Breakers
Overcurrent protection devices (fuses or circuit breakers) must be placed as close as possible to the source of power. In a battery system, this means a fuse is needed on the positive cable of every parallel battery string, right after the terminal. This critical step ensures that if one battery experiences an internal short, it cannot draw catastrophic levels of current from the other batteries in the bank. A larger, main fuse or breaker is then installed between the battery bank's main positive output (often on a busbar) and the inverter's input.
Sizing Overcurrent Protection for Inverter Surge
A common challenge is sizing a fuse or breaker that can handle the brief but powerful surge current an inverter draws when starting a large motor, yet will still blow quickly in a true short-circuit event. The primary rule is to size the protection device to protect the wire it is connected to. For example, a 4/0 AWG wire is typically rated for around 445 amps, so a 400A fuse is a suitable choice. Using a time-delay or slow-blow fuse (like a Class T fuse) is often recommended for main battery-to-inverter connections, as they are designed to tolerate momentary surges without tripping unnecessarily.
Integrating a Battery Management System (BMS)
In modern LiFePO4 battery systems, the Battery Management System (BMS) acts as the brain, providing crucial protection against over-voltage, under-voltage, extreme temperatures, and cell imbalances. While the BMS offers sophisticated electronic protection, it works in concert with physical fuses and breakers. The fuses provide brute-force protection against massive short-circuit currents that could damage the BMS itself. As energy systems become more complex, the reliability of every component is critical. This sentiment is echoed in broader energy discussions, such as the IEA's report, Unlocking the Economic Potential of Rooftop Solar PV in India, which highlights the importance of system stability for effective energy utilization.
A Final Word on System Performance
Proper wiring is not an area for compromise. It is the core framework that dictates the efficiency, safety, and reliability of your entire energy storage system. By implementing professional techniques—including meticulous wire sizing to minimize voltage drop, creating high-quality crimped connections, and deploying a strategic overcurrent protection plan—you build a system that performs optimally. These methods ensure that the power you generate and store is delivered effectively, giving you a dependable energy solution that helps you achieve greater energy independence.
Disclaimer: This article provides general information and best practices. Electrical work can be dangerous. Always comply with local electrical codes and regulations. For complex systems, consult with a qualified and licensed electrician. The information provided is not financial or legal advice.
Frequently Asked Questions
Can I solder battery cables instead of crimping them?
Soldering is not recommended for high-current battery cable connections. A proper mechanical crimp offers lower resistance and is far more resistant to vibrations, which can cause solder joints to crack and fail over time. Under a severe short circuit, a soldered connection could even melt, creating a dangerous failure.
What is the maximum recommended voltage drop for a battery system?
The industry best practice is to keep voltage drop under 3%, with a target of 2% or less for high-performance systems. Exceeding this threshold leads to significant energy waste as heat, reduced inverter performance, and can cause devices to shut down prematurely due to inaccurate low-voltage readings.
Do I need to fuse each parallel battery in a string?
Absolutely. Fusing each parallel string individually is a critical safety requirement. If one battery were to fail and create an internal short, it would attempt to draw an immense amount of current from the other parallel batteries. An individual fuse on each string isolates the faulty battery, preventing a potential fire and protecting the rest of the bank from damage.
Leave a comment
All comments are moderated before being published.
This site is protected by hCaptcha and the hCaptcha Privacy Policy and Terms of Service apply.