Setting up a 48V energy system is a significant step towards energy independence. The combination of a 48V LiFePO4 battery and a hybrid charge controller forms the core of a powerful and efficient solar setup. Proper wiring is not just a recommendation; it is fundamental for safety, performance, and the longevity of your components. This text provides clear, actionable steps for a successful 48V battery system setup, ensuring you get the most from your investment.
Pre-Installation Essentials: Tools and Safety
Before you handle any wires, thorough preparation is crucial. A successful installation begins with having the right tools and a deep respect for safety protocols. This foundation prevents mistakes and protects both you and your equipment.
Gathering the Right Tools
Having the correct tools on hand makes the process smoother and safer. You do not need a massive toolbox, but a few specific items are essential for a professional-quality job. Your toolkit should include a high-quality wire stripper, a hydraulic or manual crimper for secure lug connections, a set of insulated wrenches or sockets, and a reliable digital multimeter. The multimeter is indispensable for verifying voltages and confirming connections before energizing the system.
Safety First: A Non-Negotiable Protocol
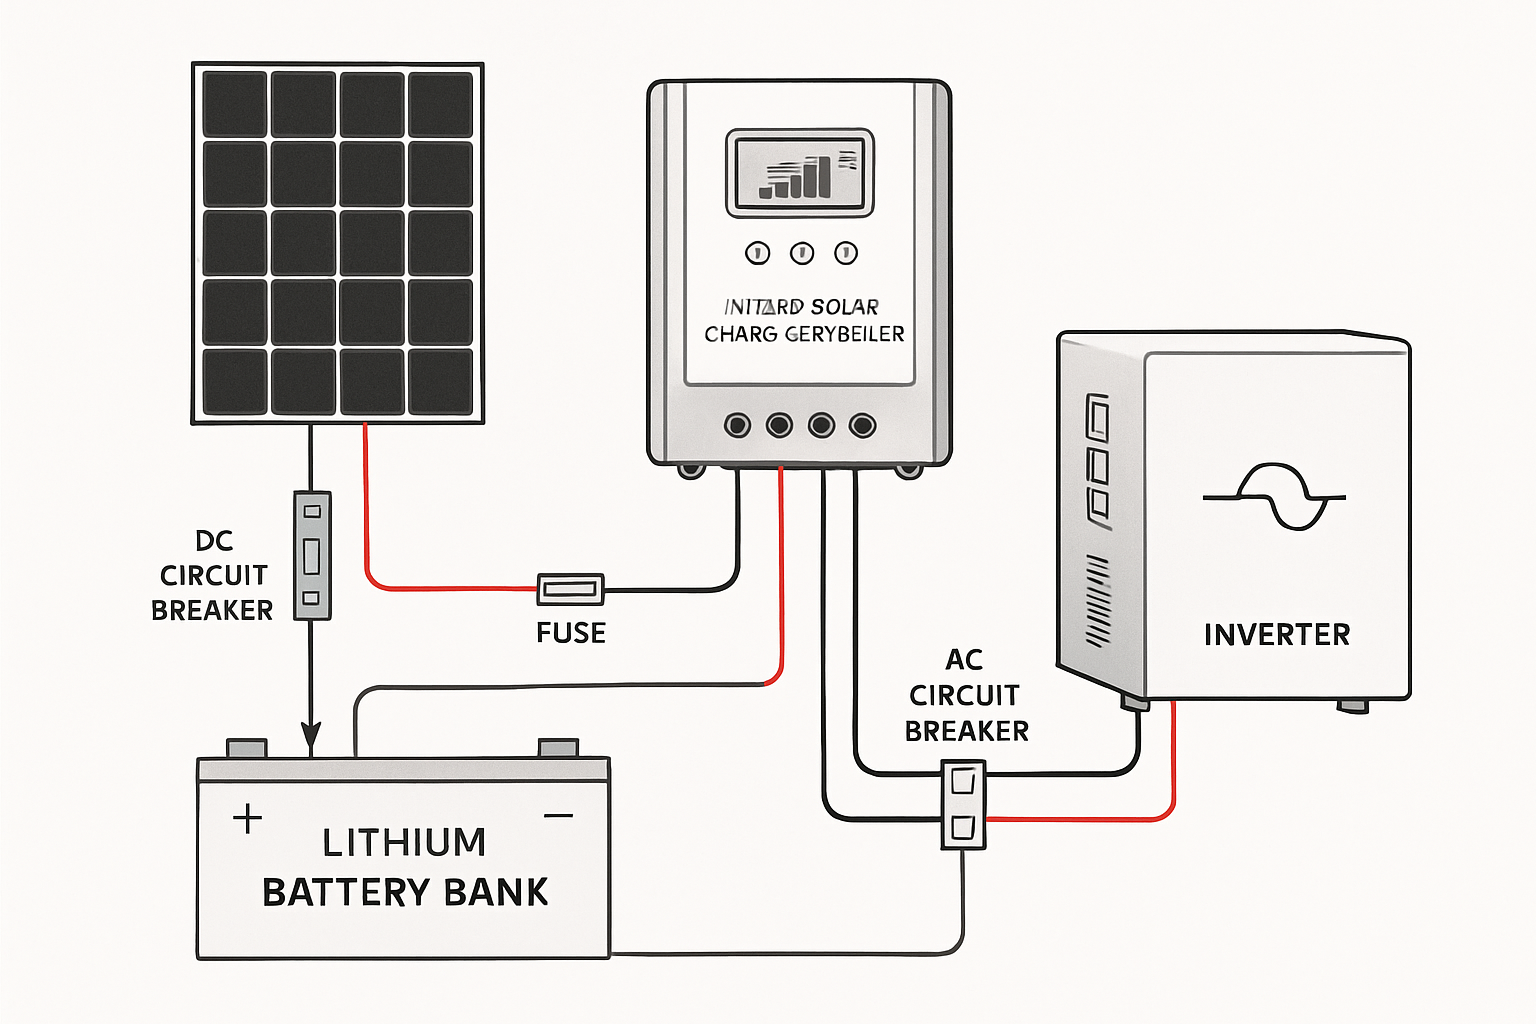
Working with 48V DC systems requires caution. While generally safer than high-voltage AC, it can still deliver a dangerous shock and create significant arcs if short-circuited. Always wear safety glasses and insulated gloves. Ensure all power sources, including solar panels and the battery, are completely disconnected before you begin. A dedicated circuit breaker or fuse on the battery's positive line is a critical safety feature. Install it, but leave it in the 'off' position until the final step.
Disclaimer: This guide provides informational content. Electrical work can be dangerous. If you are uncertain about any step, please consult a qualified electrician. This content does not constitute professional or legal advice.
Component Check and Sizing
Properly sized components are vital in a 48V system. The cables connecting your battery to the controller and inverter must be thick enough to handle the amperage without overheating. Use an ampacity chart to select the correct wire gauge based on the maximum current and length of the wire run. Fuses and breakers must also be rated appropriately to protect your equipment. An undersized fuse will blow unnecessarily, while an oversized one presents a fire hazard.
The Step-by-Step Wiring Process
With preparation complete, you can begin the connection process. The sequence of connections is important for protecting the sensitive electronics within your hybrid charge controller.
Connecting the LiFePO4 Battery
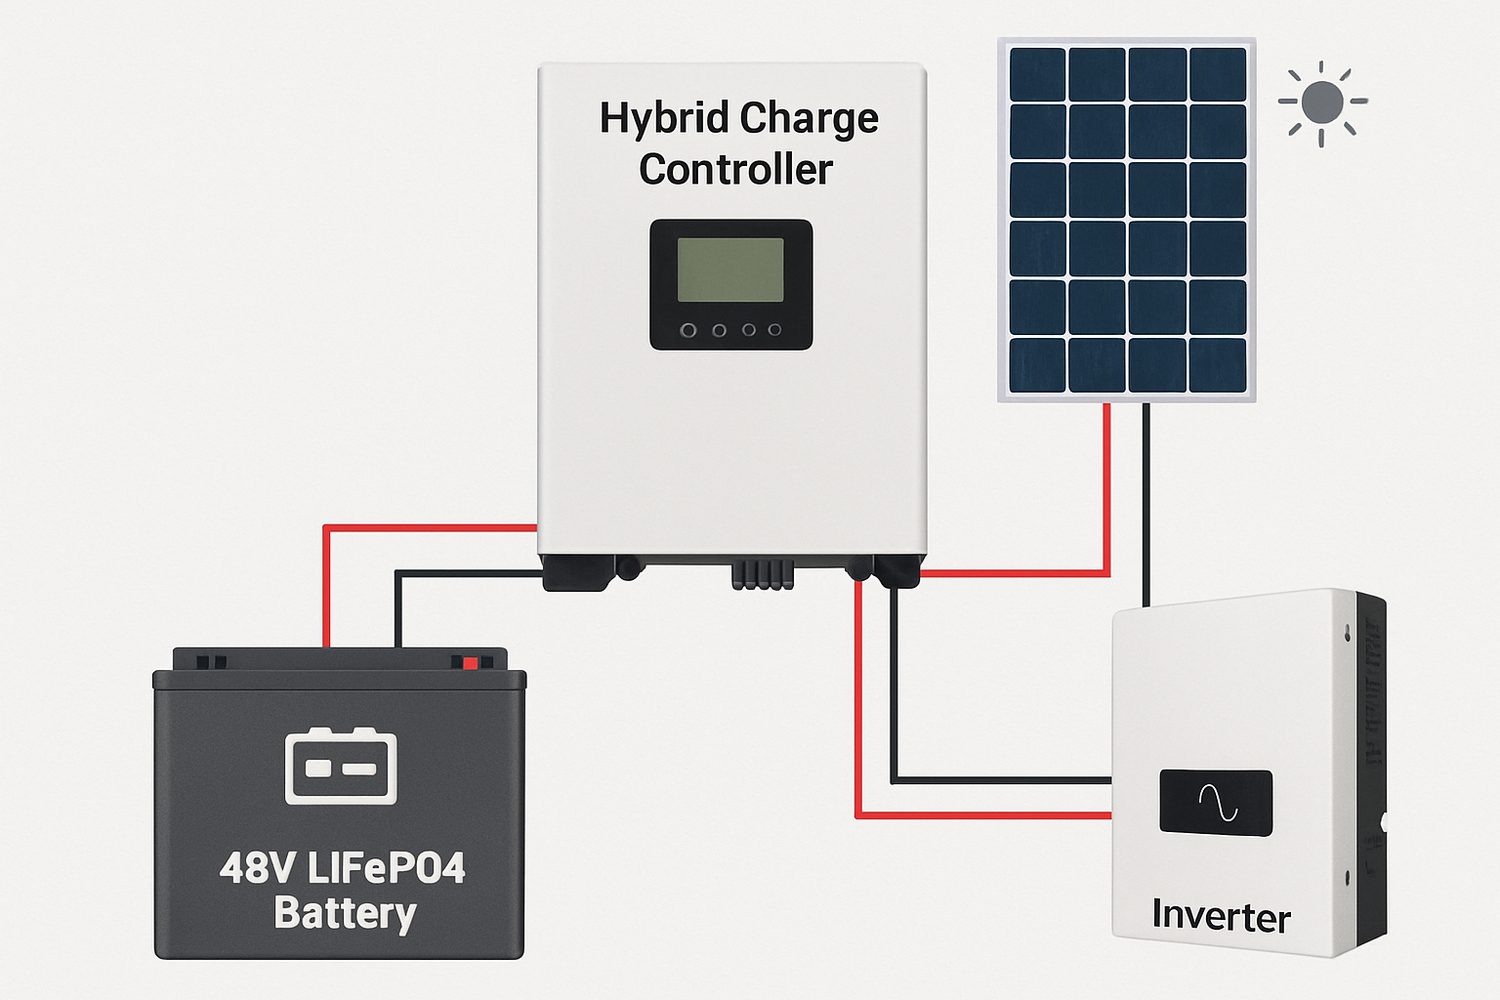
Your first physical connection should always be from the battery to the charge controller. This allows the controller to detect the system voltage (48V) and configure itself correctly. Connect the positive cable from the battery to the controller's positive battery terminal, and then connect the negative cable to the negative terminal. Ensure the connections are tight and secure. A loose connection can create resistance, generating heat and reducing efficiency.
Linking the Hybrid Charge Controller
After the battery is connected and the controller is powered on, you can proceed to connect the solar panels. Connect the positive wire from your solar array to the controller's positive PV (photovoltaic) input terminal. Do the same for the negative wire. Connecting the panels last prevents the controller from receiving power from the panels without a battery to send it to, which can damage the device.
Integrating Solar Panels and Loads
Once the battery and solar panels are connected to the controller, you can wire your inverter and any DC loads. The inverter connects directly to the battery terminals (with its own fuse), not to the load terminals of the controller, because its power draw is typically too high. Smaller DC loads, like lights or fans, can be connected to the controller's designated load terminals if it has them. This allows the controller to manage these loads and protect the battery from over-discharge.
Configuring Your Hybrid Charge Controller for LiFePO4
A generic configuration will not unlock the full potential of your LiFePO4 battery. These batteries have unique charging requirements that must be programmed into the controller for optimal health and performance.
Setting Critical Voltage Parameters
LiFePO4 batteries are sensitive to overcharging. Setting the correct voltage parameters is the most critical part of the configuration. You must set the bulk, absorption, and float charge voltages according to the battery manufacturer's specifications. Unlike lead-acid batteries, LiFePO4 batteries do not require a continuous float charge; many installers set the float voltage to the same as the resting voltage or slightly lower than the absorption voltage.
| Parameter | Typical 48V LiFePO4 Setting | Purpose |
|---|---|---|
| Bulk/Absorption Voltage | 56.8V - 58.4V | Charges the battery to full capacity. |
| Float Voltage | 54.0V - 54.4V | Maintains charge without over-stressing the cells. |
| Low Voltage Disconnect | 44.0V - 48.0V | Protects the battery from deep discharge. |
Temperature Compensation and Equalization
Two features common in controllers for lead-acid batteries must be disabled for LiFePO4. Turn off temperature compensation, as the charging voltage of LiFePO4 batteries does not need to be adjusted for temperature. More importantly, completely disable the equalization feature. Equalization charging is a high-voltage charge designed to de-sulfate lead-acid plates, and it will permanently damage a LiFePO4 battery.
Understanding Battery Management System (BMS) Communication
Many modern 48V LiFePO4 batteries include an internal Battery Management System (BMS). The BMS protects the battery from over-voltage, under-voltage, and extreme temperatures. Advanced hybrid controllers can communicate directly with the BMS via a data cable. This closed-loop communication allows the controller to receive real-time data from the battery, leading to more precise and efficient charging. If your components support this, it is highly recommended to enable it.
System Verification and Final Checks
With everything connected and configured, a final series of checks ensures your system is ready to operate safely and reliably. Do not skip this verification stage.
The Power-Up Sequence
The correct power-up sequence is the reverse of the wiring-in sequence. First, turn on the circuit breaker between the battery and the controller. The controller should power on and display the battery voltage. Next, turn on the breaker for your solar array. You should see the controller indicate that it is receiving power from the panels and beginning to charge the battery. Finally, power on your inverter and any connected loads.
Using a Multimeter for Verification
Use your multimeter to double-check voltages at key points. Confirm the voltage at the battery terminals matches what the controller is reading. Check the voltage from the solar panels at the controller's PV terminals to ensure it is within the controller's operating range. These simple checks can catch wiring errors before they cause problems. The stability of these systems is crucial as distributed energy resources become more integrated. As noted in a report by IRENA, well-managed local storage is an important enabler for grid stability. You can find more information in their publication, Grid Codes for Renewable Powered Systems.
Monitoring Performance
Most hybrid charge controllers have a display screen or an app that allows you to monitor system performance. In the first few days, watch the battery's state of charge, the energy coming from your solar panels, and the power being consumed by your loads. This monitoring helps you understand your system's capabilities and confirm that everything is working as expected. The high efficiency of LiFePO4 technology is a key factor here. As detailed in analyses on solar storage performance, LiFePO4 batteries can offer a round-trip efficiency of 95% or higher, ensuring minimal energy is lost during charging and discharging cycles.
A Final Perspective
Correctly wiring your 48V LiFePO4 battery and hybrid charge controller is a rewarding process that puts you in control of your energy. By following a methodical approach focused on safety, using the right components, and applying the correct controller settings, you build a robust and reliable power system. This setup not only provides dependable power but also serves as a cornerstone for modern energy solutions. The efficiency of these systems is vital for integrating more renewables and supporting advanced applications, a concept explored in the IRENA report Innovation Outlook: Smart charging for electric vehicles.
Frequently Asked Questions
What wire gauge is best for a 48V battery system?
The correct wire gauge depends on the maximum current (amps) and the distance of the cable run. For the main connection between a 48V battery bank and a charge controller or inverter, 2/0 AWG or 4/0 AWG wire is common, but you must calculate the specific requirement for your system to prevent voltage drop and overheating.
Why is the connection sequence so important?
Connecting the battery to the charge controller first is critical. It allows the controller to automatically detect the system's voltage (12V, 24V, or 48V) and calibrate its charging parameters accordingly. Connecting the solar panels first can feed unregulated voltage into the controller without a stable battery reference, potentially damaging its sensitive electronics.
Can I use a lead-acid battery charger setting for my LiFePO4 battery?
No, you should never use a default lead-acid setting. LiFePO4 batteries require specific charging voltages and do not need float or equalization charging. Using an incorrect profile can lead to underperformance, reduce the battery's lifespan, or even cause permanent damage. Always use the LiFePO4-specific settings or manually program the values recommended by the battery manufacturer.


Leave a comment
All comments are moderated before being published.
This site is protected by hCaptcha and the hCaptcha Privacy Policy and Terms of Service apply.