
Successfully installing a solar energy system depends heavily on its foundation: the mounting hardware that secures the panels to your roof. Retrofitting PV mounts on existing structures requires a tailored approach, as each roof material presents unique challenges and demands specific techniques. This analysis examines the technical considerations for installing solar mounts on the three most common residential roofing types—asphalt shingle, tile, and metal—to ensure a secure, waterproof, and long-lasting installation.
The Critical Role of PV Mounting Systems
PV mounts are more than just brackets; they are engineered systems designed to anchor a solar array safely for decades. They bear the weight of the panels and withstand environmental forces like wind and snow. A proper installation is fundamental to the system's safety and power generation. An improper installation can lead to roof leaks, structural damage, and reduced energy output. According to a report from the International Energy Agency, while innovative building-integrated PV (BIPV) is an emerging field, retrofitting systems onto existing roofs remains the primary method for residential solar adoption. This makes mastering retrofitting techniques essential for the industry.
Retrofitting PV Mounts on Asphalt Shingle Roofs
Asphalt shingle is the most common roofing material in North America, making it a frequent subject for solar retrofits. The primary goals are to achieve a strong connection to the roof's structural members and to ensure absolute watertightness.
Technical Approach and Waterproofing
The standard method involves locating the roof rafters and securing mounts directly into them with lag bolts. This provides the necessary strength to hold the array. The key to preventing leaks is the proper use of flashing. Flashing is a thin piece of metal installed under the shingle, creating a barrier that directs water down and away from the penetration point. Each mounting point must be meticulously sealed with a high-quality, UV-resistant sealant compatible with roofing materials. Failure to properly seal these penetrations is a common cause of roof leaks after a solar installation.
Best Practices
- Rafter Accuracy: Always locate the center of the rafters for maximum structural integrity. Missing the rafter and attaching only to the roof deck is a critical failure point.
- Quality Components: Use mounts and flashing made from durable, corrosion-resistant materials like aluminum or stainless steel.
- Sealant Application: Apply sealant generously around the pilot hole before inserting the lag bolt and at all edges of the flashing to create multiple layers of protection.
Tackling the Challenge of Tile Roofs
Tile roofs, whether clay or concrete, are durable and aesthetically pleasing but present significant challenges for retrofitting PV mounts. Their brittle nature means they can easily crack under pressure if not handled correctly.
Specialized Mounting Techniques
Drilling directly through tiles is not recommended as it creates a high risk of fracture and leaks. Instead, installers use specialized hardware like tile hooks. These hooks are L-shaped brackets that slide underneath the tile and attach directly to the roof deck and rafters. The tile is then replaced over the hook, with only the arm of the hook protruding for the racking to attach to. For some tile profiles, a 'comp-out' or 'inset' installation is performed, where a section of tiles is removed and replaced with composite shingles and flashing to create a standard mounting surface.
Best Practices
- Careful Handling: Tiles must be removed and replaced carefully to avoid breakage. Having spare tiles on hand is advisable.
- Correct Hook Selection: Use hooks designed for the specific tile profile (e.g., flat, S-tile, W-tile) to ensure a proper fit without stressing the tile.
- Weatherproofing: Even with hooks, a layer of flashing is often installed at the attachment point on the roof deck for an added layer of water protection.
The Simplicity and Strength of Metal Roofs
Metal roofs are often considered the most straightforward for solar retrofitting due to their durability and construction. The approach depends on the type of metal roof.
Standing Seam vs. Corrugated Roofs
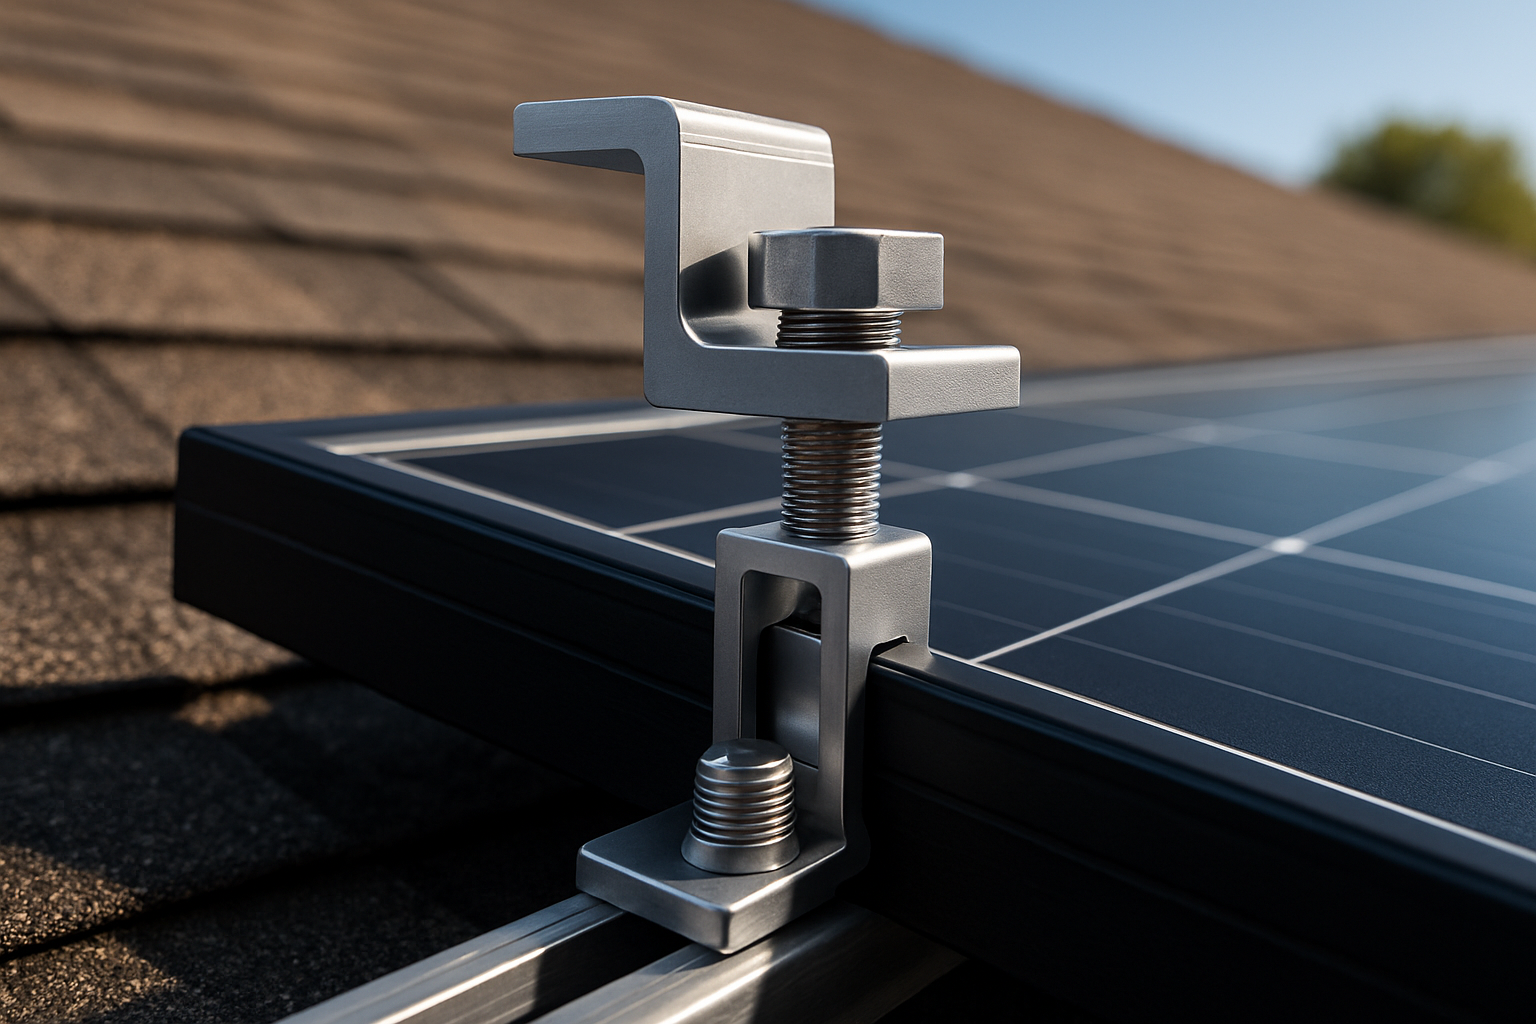
For standing seam metal roofs, the process is remarkably simple and effective. Installers use non-penetrating clamps that attach directly to the raised seams. These clamps hold the racking system securely without creating any holes in the roof, preserving its integrity and warranty. This method is fast, secure, and eliminates the risk of leaks entirely. For corrugated or R-panel metal roofs, the approach is different. Mounts are attached to the high points of the corrugation using specialized brackets and bolts with sealing washers to ensure a watertight fit. The attachment must still penetrate to the underlying roof structure for strength.
Best Practices
- Use Non-Penetrating Clamps: Whenever possible on standing seam roofs, non-penetrating clamps are the superior choice.
- Correct Torque: Ensure clamps on standing seams are torqued to the manufacturer's specifications to provide a secure grip without damaging the seam.
- Seal Penetrations: For corrugated roofs, use high-quality EPDM rubber sealing washers and apply sealant to guarantee a waterproof connection.
Ensuring Long-Term Performance
A secure mechanical installation is the first step toward optimal system performance. As detailed in the Ultimate Reference for Solar & Storage Performance, factors like panel angle, stability, and freedom from shading are critical for maximizing energy harvest. A properly retrofitted mounting system ensures the solar array remains stable and correctly oriented for its entire 25+ year lifespan, preventing performance degradation that could result from shifting or sagging panels. The structural integrity provided by a professional installation directly supports the long-term energy production and financial returns of the solar investment.
| Roof Type | Complexity | Primary Challenge | Recommended Mount |
|---|---|---|---|
| Asphalt Shingle | Moderate | Waterproofing Penetrations | Flashing with Lag Bolts |
| Tile | High | Tile Breakage & Sealing | Tile Hooks or Replacement Mounts |
| Standing Seam Metal | Low | Ensuring Correct Clamp Torque | Non-Penetrating Seam Clamps |
Final Thoughts on Retrofitting
Retrofitting PV mounts is a precise task that varies significantly with roof type. While metal roofs often offer the simplest path, successful installations on shingle and tile roofs are achieved daily through meticulous technique and specialized hardware. A thorough roof assessment before any work begins is critical to identify potential issues and plan the correct installation strategy. By respecting the unique characteristics of each roofing material, a solar array can be securely and safely integrated, providing clean energy for decades.
Disclaimer: This article is for informational purposes only and does not constitute professional installation advice. Always consult with a qualified and certified solar installer and a structural engineer to ensure the safety and compliance of your project.
Frequently Asked Questions
Can solar panels be installed on any type of roof?
Solar panels can be installed on most common roof types, including asphalt shingle, tile, and metal. However, each type requires specific mounting hardware and installation techniques to ensure a secure and waterproof fit. Roofs made of materials like slate or wood shake can be more complex and costly to work with.
Will installing PV mounts void my roof warranty?
It can, which is why it's crucial to use proper installation methods. For standing seam metal roofs, using non-penetrating clamps typically preserves the warranty. For shingle and tile roofs, many solar installers offer their own workmanship warranty to cover any potential issues and ensure the roof's integrity is maintained.
How do you prevent leaks when installing solar mounts on a shingle roof?
Leak prevention on shingle roofs relies on a multi-layered approach. Installers use metal flashing that slides under the shingles to divert water, combined with high-grade sealants applied at all penetration points. Attaching mounts directly into the roof rafters ensures a solid anchor point and minimizes stress on the surrounding area.
Leave a comment
All comments are moderated before being published.
This site is protected by hCaptcha and the hCaptcha Privacy Policy and Terms of Service apply.