Connecting a high-capacity lithium battery to a hybrid charge controller is a significant step toward energy independence. While the components are designed for performance, the safety and longevity of your system depend entirely on the quality of the installation. A methodical approach to wiring isn't just a recommendation; it's a requirement for a secure and efficient power system. This checklist provides a clear path for wiring your lithium battery storage correctly, focusing on safety at every stage.
Foundational Knowledge: Tools and Components
Before you begin, gathering the right tools and understanding each component's role is essential. Proper preparation prevents mistakes and ensures a smooth installation process.
Assembling Your Toolkit
Using the correct tools is not about convenience; it's about safety and creating secure connections. Your essential toolkit should include:
- Insulated Hand Tools: Screwdrivers and wrenches with insulated handles reduce the risk of short circuits and electrical shock.
- Wire Strippers and Crimpers: These are for creating clean, secure connections between your cables and terminals. A poor crimp can lead to high resistance, heat, and potential failure.
- Digital Multimeter: This is a non-negotiable tool for verifying voltage and polarity before, during, and after the installation.
- Personal Protective Equipment (PPE): Always wear safety glasses and insulated gloves. Lithium batteries can store a tremendous amount of energy, and protecting yourself is the top priority.
Understanding the Core Components
Your energy storage system consists of several key parts working in concert. Knowing their functions is key to a successful wiring job.
- Lithium Iron Phosphate (LiFePO4) Battery: This is the heart of your system, storing the energy collected by your solar panels. LiFePO4 chemistry is known for its stability and long lifespan.
- Hybrid Charge Controller: This device is the brain of the operation. It regulates the flow of electricity from the solar panels to the battery, preventing overcharging and optimizing the charging process.
- Inverter: The inverter converts the direct current (DC) power from your batteries into alternating current (AC) power that your home appliances can use.
- Fuses and Circuit Breakers: These are critical safety devices. They protect your components and wiring from overcurrent situations that could cause damage or fire.
Pre-Installation Safety Protocols
The steps you take before connecting a single wire are just as important as the wiring itself. A safe environment and a clear plan are the cornerstones of a professional installation.
Creating a Safe Workspace
Designate a clean, dry, and well-ventilated area for your battery and components. Lithium batteries should be operated within their specified temperature range, so avoid locations with extreme heat or cold. Ensure there is no clutter that could create a fire or tripping hazard.
Personal Protective Equipment (PPE) is Non-Negotiable
Always wear your safety glasses and insulated gloves. Remove any jewelry, as metallic items can easily cause a short circuit if they come into contact with battery terminals. An accidental short circuit on a high-capacity lithium battery can result in a dangerous arc flash.
Reading the Manuals: Your First Step to Success
Every battery, charge controller, and inverter comes with a manufacturer's manual. These documents contain vital information, including torque specifications for terminals, recommended wire sizes, and specific safety warnings. Always read and follow these instructions carefully. Adhering to established standards, such as those outlined by the International Electrotechnical Commission (IEC), is also a crucial aspect of ensuring system safety and functionality. As noted in the Quality infrastructure for smart mini-grids report, standards like IEC 62257-8-1 are fundamental for battery system selection.
The Step-by-Step Wiring Checklist
With preparations complete, you can begin the wiring process. Follow this sequence meticulously to ensure all connections are correct and secure.
Step 1: System Sizing and Component Matching
Before making connections, verify that your components are correctly matched. This includes ensuring your wire gauge is sufficient for the amperage it will carry and that your fuses are rated correctly. Undersized wires can overheat and become a fire hazard, while improperly sized fuses can fail to protect your equipment. Understanding how to size components correctly is fundamental to achieving peak system efficiency. For a deeper look into how different factors affect your system, the ultimate reference on solar storage performance offers valuable data on optimizing your setup.
Step 2: Battery and Controller Connection
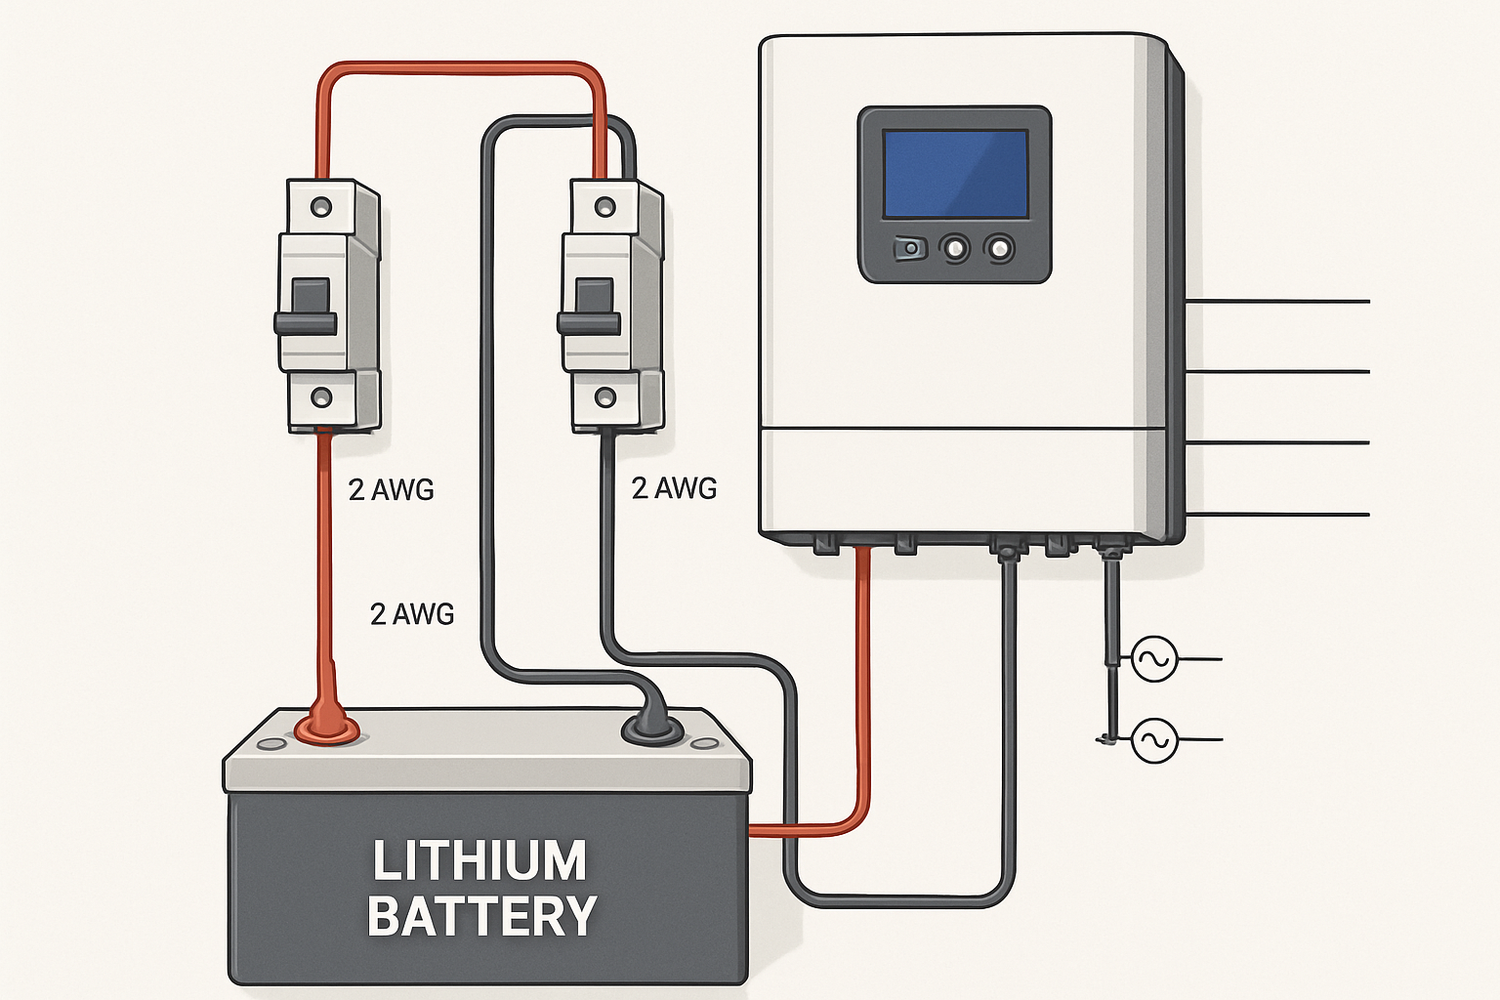
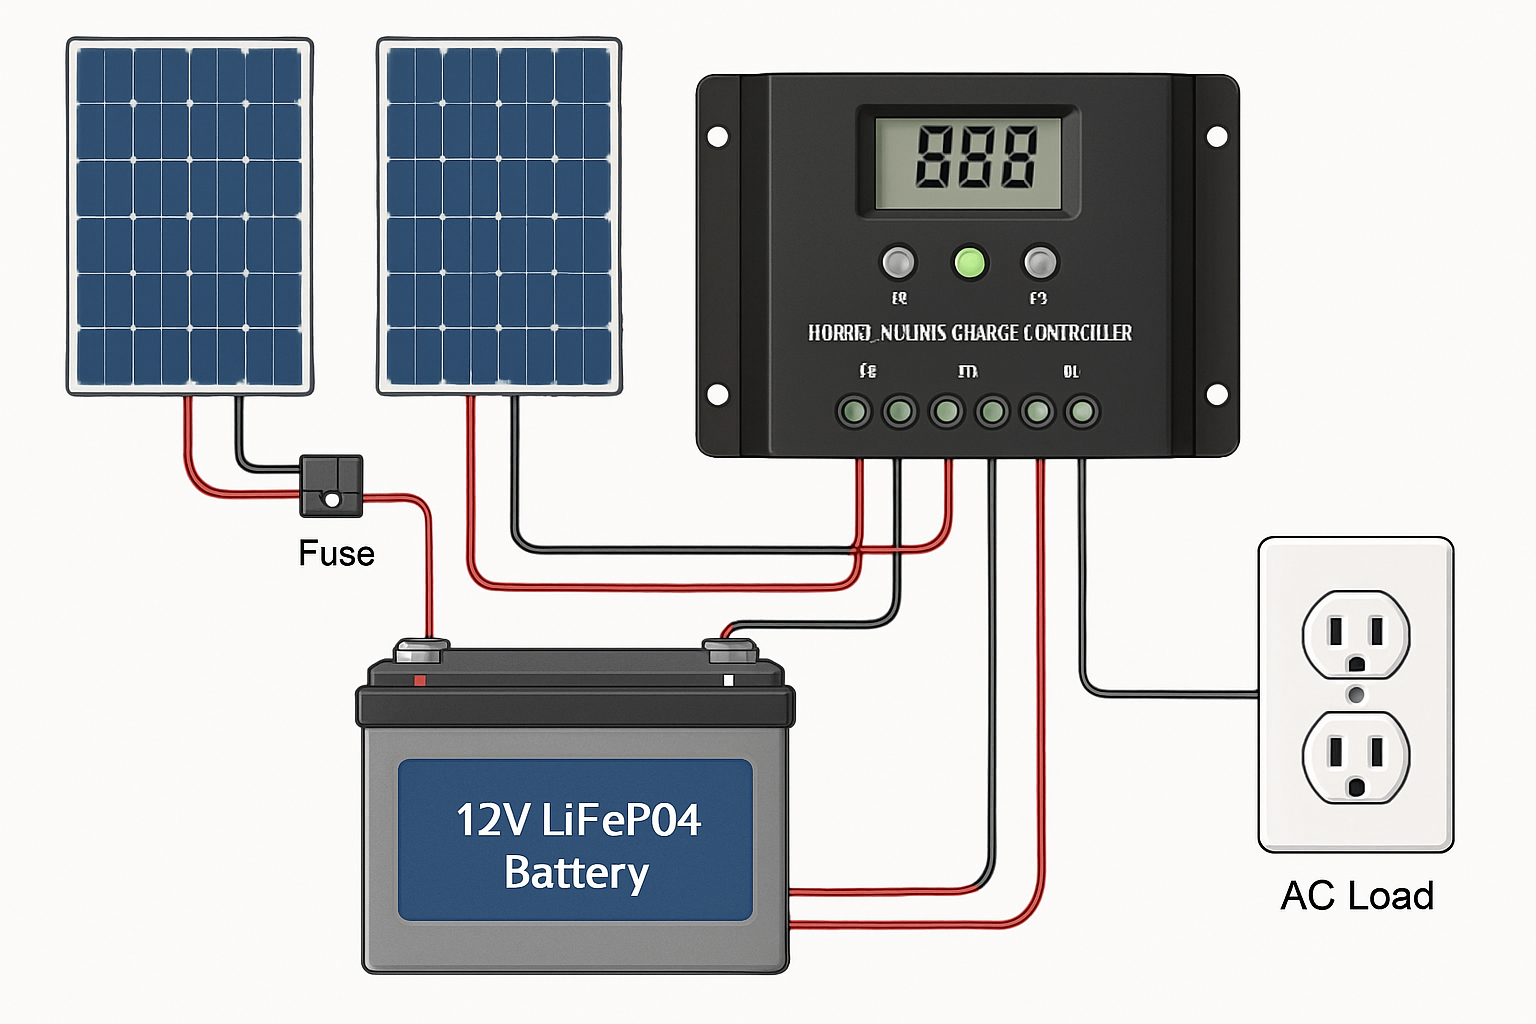
The order of connection is critical. Always connect the battery to the hybrid charge controller *before* connecting the solar panels. This allows the controller to detect the system voltage (e.g., 12V, 24V, 48V) and configure itself accordingly. Ensure the main breaker between the battery and controller is in the 'off' position during this step. Connect the positive (+) cable to the positive terminal and the negative (-) cable to the negative terminal. Use a torque wrench to tighten the terminal connections to the manufacturer's specification.
Step 3: Integrating Solar Panels and Loads
Once the charge controller recognizes the battery, you can connect the solar panel array. Again, ensure the breaker for the solar panels is off. Connect the positive and negative wires from the panels to the corresponding PV inputs on the charge controller. Double-check the polarity with your multimeter. After the PV input is secure, you can connect the output of the controller to your inverter or DC load panel.
Step 4: Installing Protective Devices
Fuses or circuit breakers are essential for safety. They must be installed in the correct locations to protect the system. A breaker or fuse is required on the positive line between the battery bank and the hybrid charge controller. Another should be placed between the charge controller and the inverter. The International Renewable Energy Agency's Electricity Storage Valuation Framework highlights the importance of adhering to safety standards like UL 2054 and USNEC Article 480 for battery installations.
| System Voltage | Typical Inverter Size | Recommended Breaker Size | Minimum Wire Gauge (AWG) |
|---|---|---|---|
| 12V | 1000W | 125A | 2 AWG |
| 24V | 2000W | 100A | 4 AWG |
| 48V | 4000W | 100A | 6 AWG |
Disclaimer: This table provides general estimates. Always consult your component manuals and a certified electrician for precise sizing based on your specific equipment and wire length.
Post-Installation Checks and Commissioning
Your work isn't finished once the last wire is connected. A series of checks ensures everything is working as intended before the system goes live.
The Triple-Check: Verifying Your Connections
With all breakers still off, use your multimeter to check for correct voltage and polarity at every connection point. Check the battery voltage at the battery terminals and then at the charge controller's battery input terminals. The readings should be nearly identical. A significant voltage drop indicates a poor connection that needs to be addressed.
Powering Up the System Safely
Follow a specific sequence to energize your system. First, turn on the breaker between the battery and the charge controller. The controller should power on and display the battery status. Next, turn on the breaker for the solar panel array. You should see the controller begin to register PV input and start charging the battery. Finally, you can power on your inverter.
Monitoring and Maintenance Best Practices
Once your system is operational, regularly monitor its performance through the charge controller's display or any associated software. Periodically conduct visual inspections of the wiring to ensure all connections remain tight and free of corrosion. This proactive approach helps maintain both the safety and efficiency of your investment.
Final Thoughts on System Safety and Longevity
Wiring a lithium battery storage system is a task that demands precision and respect for electricity. By following a safety-first checklist, you are not just connecting components; you are building a reliable, long-lasting power source for your home. Taking the time to double-check your work, use the right tools, and follow manufacturer guidelines will pay dividends in system performance and peace of mind.
Frequently Asked Questions
What gauge wire should I use for my lithium battery bank?
The correct wire gauge depends on the current (amps) and the length of the wire run. A thicker wire (lower AWG number) is needed for higher currents or longer distances to minimize voltage drop and prevent overheating. Always consult the manufacturer's manual for your components and use an AWG sizing chart for an accurate calculation.
Can I mix different types or ages of lithium batteries?
It is strongly advised not to mix batteries of different chemistries, capacities, or ages in the same battery bank. Doing so can lead to severe imbalances during charging and discharging, which reduces overall capacity, shortens the lifespan of the batteries, and can create significant safety hazards.
Where is the best place to install a circuit breaker?
Circuit breakers or fuses should always be installed on the positive conductor as close to the source of power as practical. For a solar energy system, this means installing a breaker between the battery's positive terminal and the hybrid charge controller, and another between the positive output of the controller and the inverter or load center.


Leave a comment
All comments are moderated before being published.
This site is protected by hCaptcha and the hCaptcha Privacy Policy and Terms of Service apply.