


Installing a new solar and energy storage system represents a significant step towards energy independence. Once the installation crew leaves, you might wonder about the next steps. This comprehensive guide provides a clear post-installation checklist, ensuring your system operates efficiently and safely from day one. You will gain confidence in managing your new energy asset and maximize your investment.
A properly verified and maintained system delivers consistent power and long-term savings. This checklist covers everything from initial visual checks to understanding performance metrics and routine maintenance. It serves as your authoritative resource for the crucial period immediately following installation and for years to come.

Initial System Verification: Your First Steps
The first few days after installation are critical for confirming your system's proper setup. Taking the time to perform these initial checks helps identify any immediate concerns and ensures everything functions as intended.
Visual Inspection of Components
Begin with a thorough visual inspection of all installed components. Look for any visible damage or irregularities. This includes your solar panels, wiring, and mounting hardware.
- Solar Panels: Confirm panels are securely mounted and free from cracks, chips, or scratches. Check for consistent spacing and alignment.
- Wiring and Conduits: Inspect all visible wiring and conduits for proper routing and secure connections. Ensure no wires are hanging loose or appear damaged.
- Inverter Location: Verify the inverter is mounted securely in its designated location, free from obstructions, and with adequate ventilation.
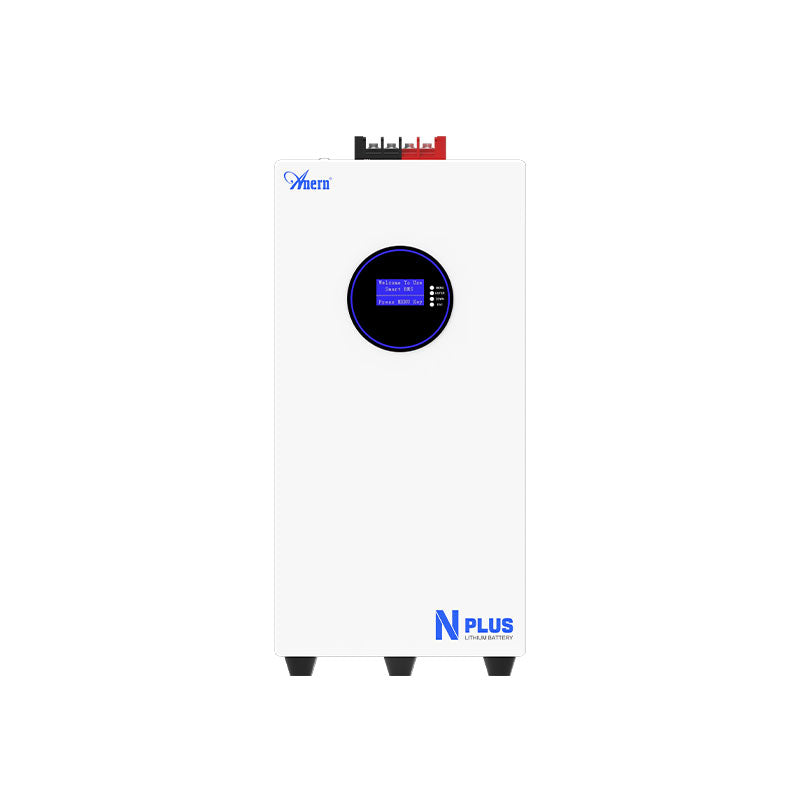
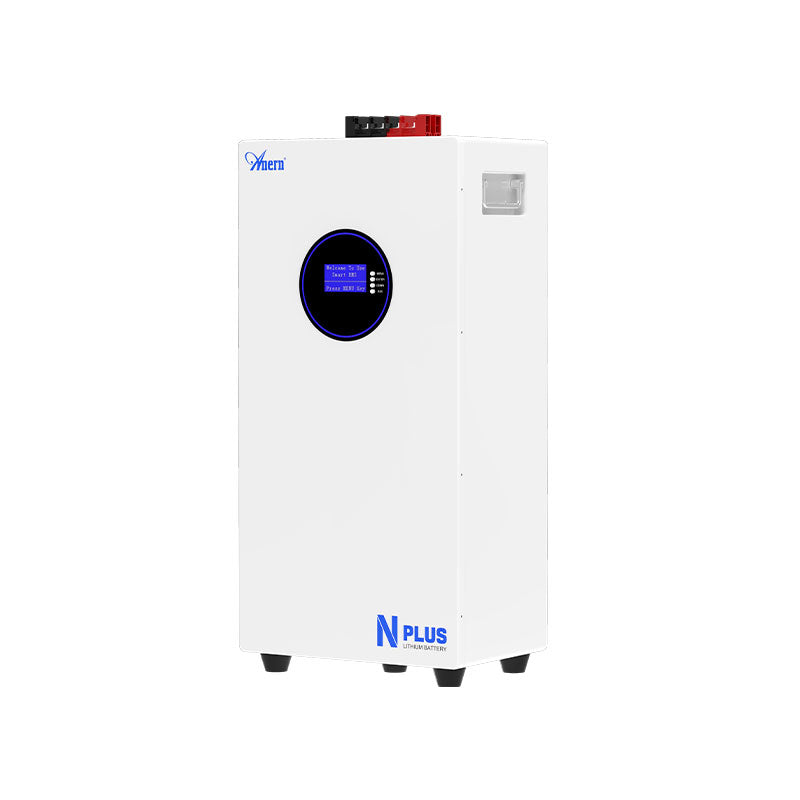
- Battery Enclosure: If you have an energy storage system, check the battery enclosure for secure installation and proper sealing. Ensure no exposed wires or components are visible. ANERN's LiFePO4 and ESS Settings: Your Day-1 Battery Health Checklist provides specific guidance for battery systems.
For more detailed insights on what to look for, refer to 12 Items to Verify After Solar Install: Homeowner Day-One.
Inverter Status and Readings
Your solar inverter is the brain of your system, converting direct current (DC) from your panels into alternating current (AC) for your home. Understanding its initial readings is essential.
- Power On: Confirm the inverter is powered on and displaying operational status. Most inverters have indicator lights or a digital screen.
- Error Codes: Check for any error codes or warning messages. If you see any, consult your installer or the inverter manual immediately.
- Initial Output: Observe the power output readings. On a sunny day, you should see electricity generation. The specific readings can vary based on solar irradiance and time of day. What Should Your Inverter Show on Day 1? Expert Answers offers expert perspectives on expected initial inverter behavior.
- Connection Status: Verify that the inverter is connected to your home's electrical panel and, if applicable, to the grid.
Battery System Checks (for Energy Storage)
For homes with energy storage, such as ANERN's reliable LiFePO4 batteries and integrated ESS solutions, verifying the battery system is crucial.
- Charge Level: Check the initial state of charge (SOC) displayed on your battery system's monitoring interface. It might not be at 100% immediately after installation.
- Communication: Ensure the battery system is communicating properly with the inverter. This is often indicated by specific lights or messages on the inverter or battery management system (BMS).
- Operating Modes: Confirm the battery system is set to your desired operating mode (e.g., self-consumption, backup, time-of-use). ANERN's ESS integrates seamlessly, allowing for flexible operation tailored to your needs.
Understanding System Performance and Monitoring
Once you confirm the initial setup, the next step involves monitoring your system's performance. This helps you understand how much energy you are producing and consuming, and identify any potential issues early.
Monitoring Tools and Apps
Most modern solar and energy storage systems come with dedicated monitoring platforms, often accessible via a web portal or smartphone app. These tools provide real-time and historical data on your system's performance.
- Access Setup: Ensure you have received login credentials for your monitoring portal and successfully accessed it.
- Data Verification: Compare the data displayed in the app with your inverter's physical readings. They should align closely.
- Features Exploration: Familiarize yourself with the app's features, such as daily/monthly/annual production, consumption tracking, and battery status. Best Apps and Meters for Your Post-Install Solar Checkup provides a good overview of available tools.
Key Performance Indicators (KPIs) for the First Week
During the first week, pay attention to specific KPIs to gauge your system's health and efficiency. This period is a learning curve for both you and your system.
- Daily Energy Production: Track your system's daily kilowatt-hour (kWh) output. Compare it to estimated production figures provided by your installer, considering weather conditions.
- Energy Consumption: Understand your home's energy usage patterns. This helps you optimize self-consumption, especially if you have an ANERN ESS.
- Battery Charge/Discharge Cycles: If you have an ESS, monitor how often your battery charges and discharges. This indicates how well it is managing your energy needs.
- Grid Interaction: For grid-tied systems, observe periods of energy export to the grid and import from the grid. This helps confirm net metering is functioning correctly. For off-grid solutions, ensure your ANERN system consistently meets your power demands. Track What Matters: 10 KPIs for Your First Week After Install offers deeper insights into these metrics.
Troubleshooting Common Initial Issues
While rare, you might encounter minor issues in the first few days. Knowing how to address them can save time and unnecessary service calls.
- No Production: Check the inverter status. Is it on? Are there error codes? Ensure the AC and DC disconnects are in the "ON" position.
- Low Production: Verify no shadows are cast on the panels. Check for unusual weather conditions. The system may take a few days to reach optimal performance.
- Communication Errors: If your monitoring app is not receiving data, check your internet connection and the inverter's Wi-Fi or ethernet connection.
For a more comprehensive guide on resolving common issues, consult 7 Post-Install Mistakes Homeowners Make, and How to Fix Them.
Maintenance, Safety, and Long-Term Care
A solar and energy storage system is a long-term investment. Regular maintenance and adherence to safety protocols ensure its longevity and continued performance.
Routine Maintenance Schedule
While solar systems require minimal maintenance, some routine checks are beneficial.
- Panel Cleaning: Periodically clean your solar panels, especially after long dry spells or heavy dust. Rain often takes care of light debris.
- Vegetation Management: Ensure no new trees or shrubs begin to cast shadows on your panels as they grow.
- Inverter and Battery Area: Keep the areas around your inverter and battery system clear of clutter to ensure proper ventilation.
- Professional Inspections: Consider scheduling periodic professional inspections, perhaps every few years, to ensure all components are performing optimally and safely.
Safety Audits for Roof Arrays and Electrical Components
Safety is paramount. While professionals perform the installation, understanding basic safety checks contributes to your peace of mind.
- Mounting Integrity: Visually inspect the panel mounting from the ground periodically. Look for any signs of loose hardware or shifting.
- Wiring Integrity: Avoid tampering with any electrical components. If you notice exposed wires or unusual smells, contact your installer or a qualified electrician immediately.
- Emergency Shut-off: Locate and understand how to operate your system's AC and DC disconnect switches for emergency situations. Stop Guessing: A Safety-First Post-Install Audit for Roof Arrays offers more specific safety guidelines.
Warranty Activation and Compliance
Your solar and energy storage system comes with various warranties, covering panels, inverters, batteries, and workmanship. Activating and understanding these warranties protects your investment.
- Documentation Review: Gather all warranty documents provided by your installer and equipment manufacturers.
- Registration: Register your products with the manufacturers as required to activate warranties. This is a critical step often overlooked.
- Compliance: Understand any conditions that might void your warranty, such as unauthorized modifications or improper maintenance. ANERN's products, including our high-performance LiFePO4 batteries, come with clear warranty terms designed to give you confidence. Activate Warranties: A Post-Install Compliance Checklist provides a detailed guide on this process.
Achieving Energy Independence: Maximizing Your System's Potential
Your solar and energy storage system is a tool for achieving greater energy independence. Understanding how to optimize its use allows you to reap the full benefits.
Optimizing Energy Usage with Storage
An energy storage system, particularly one powered by ANERN's advanced LiFePO4 batteries, empowers you to manage your energy more effectively.
- Self-Consumption: Prioritize using the energy you generate. Adjust your habits to run high-energy appliances during peak solar production hours.
- Time-of-Use (TOU) Optimization: If your utility has TOU rates, program your battery to charge during off-peak hours (when electricity is cheaper) and discharge during peak hours (when it's more expensive).
- Backup Power: Understand your system's backup capabilities. During grid outages, your ANERN ESS can provide reliable power to critical loads, offering unparalleled security.
Grid-Tied vs. Off-Grid Specific Considerations
The specific checks and optimizations vary slightly depending on whether your system is grid-tied or off-grid.
- Grid-Tied Systems: Focus on understanding net metering, monitoring energy export/import, and ensuring seamless grid synchronization. Electricity grids are undergoing significant expansion globally, with projections indicating an 80% increase in new transmission and distribution lines over the next decade compared to the last, partly driven by increased renewable energy integration.
- Off-Grid Systems: Your ANERN off-grid solar solution provides complete energy independence. Focus on managing your energy consumption to match production and storage capacity, especially during periods of low sunlight. This includes carefully monitoring battery health and ensuring your system can handle peak loads without relying on external power. Grid-Tied vs Off-Grid: Different Post-Install Checks That Matter details these distinctions.
Future-Proofing Your Investment
The solar and energy storage industry is constantly evolving. Staying informed helps you maximize your system's long-term value.
- Software Updates: Keep your inverter and battery management system software updated. Manufacturers frequently release updates to improve performance and add features.
- System Expansion: Consider future energy needs. ANERN offers scalable solutions, allowing you to expand your system with additional panels or battery capacity if your energy demands grow.
- Technology Advancements: While your current system is designed for long-term performance, be aware of emerging technologies that could further enhance your energy independence.
Your Path to Energy Confidence
Completing your solar and energy storage system installation is an exciting milestone. By diligently following this post-installation checklist, you empower yourself with the knowledge and tools to ensure your system operates at its best.
ANERN, with years of experience in solar and energy storage, is committed to providing reliable, scalable energy solutions, from high-performance LiFePO4 batteries to integrated home ESS and versatile off-grid solar solutions. Our focus on quality and innovation helps you achieve true energy independence.
Remember, your system is a dynamic asset. Regular monitoring, proactive maintenance, and understanding its capabilities will help you enjoy clean, reliable energy for decades to come. Welcome to a more sustainable and independent energy future.
Disclaimer: The information provided in this article is for general informational purposes only and does not constitute professional advice. For specific technical guidance or legal advice, consult with a qualified professional.
Table 1: Key Post-Installation Checks and Their Importance
| Checklist Item | Purpose | Frequency | Expected Outcome |
|---|---|---|---|
| Visual Inspection of Components | Identify immediate physical damage or installation errors. | Day 1, then quarterly | No visible damage, secure components. |
| Inverter Status & Readings | Confirm system is powered on and generating power. | Daily (first week), then weekly/monthly | Operational status, no error codes, positive power output. |
| Battery System Status (if applicable) | Verify battery communication, charge, and operating mode. | Daily (first week), then weekly/monthly | Correct SOC, seamless communication with inverter. |
| Monitoring App Access & Data | Ensure remote access to performance data. | Day 1, then periodically | Successful login, accurate data mirroring physical readings. |
| Warranty Activation | Secure long-term protection for your investment. | Within specified manufacturer timeframe (typically 30-90 days post-install) | All product warranties registered and confirmed. |
| Emergency Shut-off Location | Know how to safely power down the system. | Day 1 | Clear understanding of disconnect switch locations and operation. |
The global electricity grid is undergoing significant transformation to support clean energy transitions. HVDC systems, for example, represent about 7% of newly installed transmission systems and are expected to grow, reflecting the need for robust infrastructure to handle increasing renewable contributions.
The integration of electric vehicles also promises significant flexibility, encouraging local renewable installations and offering system operators more accommodation for increased variable renewable energy shares.
Governments play a role in fostering innovation, with demonstration projects at Technology Readiness Level (TRL) 7 or 8 being crucial for proving new designs and facilitating further investment.
These broader trends underscore the importance of reliable and efficient solar and storage systems at the homeowner level, contributing to a more flexible and resilient energy future. The emphasis on robust grid infrastructure and smart energy management aligns with the benefits homeowners gain from their post-installation checklist.
Installing a new solar and energy storage system represents a significant step towards energy independence. Once the installation crew leaves, you might wonder about the next steps. This comprehensive guide provides a clear post-installation checklist, ensuring your system operates efficiently and safely from day one. You will gain confidence in managing your new energy asset and maximize your investment.
A properly verified and maintained system delivers consistent power and long-term savings. This checklist covers everything from initial visual checks to understanding performance metrics and routine maintenance. It serves as your authoritative resource for the crucial period immediately following installation and for years to come.
Initial System Verification: Your First Steps
The first few days after installation are critical for confirming your system's proper setup. Taking the time to perform these initial checks helps identify any immediate concerns and ensures everything functions as intended.
Visual Inspection of Components
Begin with a thorough visual inspection of all installed components. Look for any visible damage or irregularities. This includes your solar panels, wiring, and mounting hardware.
- Solar Panels: Confirm panels are securely mounted and free from cracks, chips, or scratches. Check for consistent spacing and alignment.
- Wiring and Conduits: Inspect all visible wiring and conduits for proper routing and secure connections. Ensure no wires are hanging loose or appear damaged.
- Inverter Location: Verify the inverter is mounted securely in its designated location, free from obstructions, and with adequate ventilation.
- Battery Enclosure: If you have an energy storage system, check the battery enclosure for secure installation and proper sealing. Ensure no exposed wires or components are visible. ANERN's LiFePO4 and ESS Settings: Your Day-1 Battery Health Checklist provides specific guidance for battery systems.
For more detailed insights on what to look for, refer to 12 Items to Verify After Solar Install: Homeowner Day-One.
Inverter Status and Readings
Your solar inverter is the brain of your system, converting direct current (DC) from your panels into alternating current (AC) for your home. Understanding its initial readings is crucial.
- Power On: Confirm the inverter is powered on and displaying operational status. Most inverters have indicator lights or a digital screen.
- Error Codes: Check for any error codes or warning messages. If you see any, consult your installer or the inverter manual immediately.
- Initial Output: Observe the power output readings. On a sunny day, you should see electricity generation. The specific readings can vary based on solar irradiance and time of day. What Should Your Inverter Show on Day 1? Expert Answers offers expert perspectives on expected initial inverter behavior.
- Connection Status: Verify that the inverter is connected to your home's electrical panel and, if applicable, to the grid.
Battery System Checks (for Energy Storage)
For homes with energy storage, such as ANERN's reliable LiFePO4 batteries and integrated ESS solutions, verifying the battery system is crucial.
- Charge Level: Check the initial state of charge (SOC) displayed on your battery system's monitoring interface. It might not be at 100% immediately after installation.
- Communication: Ensure the battery system is communicating properly with the inverter. This is often indicated by specific lights or messages on the inverter or battery management system (BMS).
- Operating Modes: Confirm the battery system is set to your desired operating mode (e.g., self-consumption, backup, time-of-use). ANERN's ESS integrates seamlessly, allowing for flexible operation tailored to your needs.
Understanding System Performance and Monitoring
Once you confirm the initial setup, the next step involves monitoring your system's performance. This helps you understand how much energy you are producing and consuming, and identify any potential issues early.
Monitoring Tools and Apps
Most modern solar and energy storage systems come with dedicated monitoring platforms, often accessible via a web portal or smartphone app. These tools provide real-time and historical data on your system's performance.
- Access Setup: Ensure you have received login credentials for your monitoring portal and successfully accessed it.
- Data Verification: Compare the data displayed in the app with your inverter's physical readings. They should align closely.
- Features Exploration: Familiarize yourself with the app's features, such as daily/monthly/annual production, consumption tracking, and battery status. Best Apps and Meters for Your Post-Install Solar Checkup provides a good overview of available tools.
Key Performance Indicators (KPIs) for the First Week
During the first week, pay attention to specific KPIs to gauge your system's health and efficiency. This period is a learning curve for both you and your system.
- Daily Energy Production: Track your system's daily kilowatt-hour (kWh) output. Compare it to estimated production figures provided by your installer, considering weather conditions.
- Energy Consumption: Understand your home's energy usage patterns. This helps you optimize self-consumption, especially if you have an ANERN ESS.
- Battery Charge/Discharge Cycles: If you have an ESS, monitor how often your battery charges and discharges. This indicates how well it is managing your energy needs.
- Grid Interaction: For grid-tied systems, observe periods of energy export to the grid and import from the grid. This helps confirm net metering is functioning correctly. For off-grid solutions, ensure your ANERN system consistently meets your power demands. Track What Matters: 10 KPIs for Your First Week After Install offers deeper insights into these metrics.
Troubleshooting Common Initial Issues
While rare, you might encounter minor issues in the first few days. Knowing how to address them can save time and unnecessary service calls.
- No Production: Check the inverter status. Is it on? Are there error codes? Ensure the AC and DC disconnects are in the "ON" position.
- Low Production: Verify no shadows are cast on the panels. Check for unusual weather conditions. The system may take a few days to reach optimal performance.
- Communication Errors: If your monitoring app is not receiving data, check your internet connection and the inverter's Wi-Fi or ethernet connection.
For a more comprehensive guide on resolving common issues, consult 7 Post-Install Mistakes Homeowners Make, and How to Fix Them.
Maintenance, Safety, and Long-Term Care
A solar and energy storage system is a long-term investment. Regular maintenance and adherence to safety protocols ensure its longevity and continued performance.
Routine Maintenance Schedule
While solar systems require minimal maintenance, some routine checks are beneficial.
- Panel Cleaning: Periodically clean your solar panels, especially after long dry spells or heavy dust. Rain often takes care of light debris.
- Vegetation Management: Ensure no new trees or shrubs begin to cast shadows on your panels as they grow.
- Inverter and Battery Area: Keep the areas around your inverter and battery system clear of clutter to ensure proper ventilation.
- Professional Inspections: Consider scheduling periodic professional inspections, perhaps every few years, to ensure all components are performing optimally and safely.
Safety Audits for Roof Arrays and Electrical Components
Safety is paramount. While professionals perform the installation, understanding basic safety checks contributes to your peace of mind.
- Mounting Integrity: Visually inspect the panel mounting from the ground periodically. Look for any signs of loose hardware or shifting.
- Wiring Integrity: Avoid tampering with any electrical components. If you notice exposed wires or unusual smells, contact your installer or a qualified electrician immediately.
- Emergency Shut-off: Locate and understand how to operate your system's AC and DC disconnect switches for emergency situations. Stop Guessing: A Safety-First Post-Install Audit for Roof Arrays offers more specific safety guidelines.
Warranty Activation and Compliance
Your solar and energy storage system comes with various warranties, covering panels, inverters, batteries, and workmanship. Activating and understanding these warranties protects your investment.
- Documentation Review: Gather all warranty documents provided by your installer and equipment manufacturers.
- Registration: Register your products with the manufacturers as required to activate warranties. This is a critical step often overlooked.
- Compliance: Understand any conditions that might void your warranty, such as unauthorized modifications or improper maintenance. ANERN's products, including our high-performance LiFePO4 batteries, come with clear warranty terms designed to give you confidence. Activate Warranties: A Post-Install Compliance Checklist provides a detailed guide on this process.
Achieving Energy Independence: Maximizing Your System's Potential
Your solar and energy storage system is a tool for achieving greater energy independence. Understanding how to optimize its use allows you to reap the full benefits.
Optimizing Energy Usage with Storage
An energy storage system, particularly one powered by ANERN's advanced LiFePO4 batteries, empowers you to manage your energy more effectively.
- Self-Consumption: Prioritize using the energy you generate. Adjust your habits to run high-energy appliances during peak solar production hours.
- Time-of-Use (TOU) Optimization: If your utility has TOU rates, program your battery to charge during off-peak hours (when electricity is cheaper) and discharge during peak hours (when it's more expensive).
- Backup Power: Understand your system's backup capabilities. During grid outages, your ANERN ESS can provide reliable power to critical loads, offering unparalleled security.
Grid-Tied vs. Off-Grid Specific Considerations
The specific checks and optimizations vary slightly depending on whether your system is grid-tied or off-grid.
- Grid-Tied Systems: Focus on understanding net metering, monitoring energy export/import, and ensuring seamless grid synchronization. Electricity grids are undergoing significant expansion globally, with projections indicating an 80% increase in new transmission and distribution lines over the next decade compared to the last, partly driven by increased renewable energy integration.
- Off-Grid Systems: Your ANERN off-grid solar solution provides complete energy independence. Focus on managing your energy consumption to match production and storage capacity, especially during periods of low sunlight. This includes carefully monitoring battery health and ensuring your system can handle peak loads without relying on external power. Grid-Tied vs Off-Grid: Different Post-Install Checks That Matter details these distinctions.
Future-Proofing Your Investment
The solar and energy storage industry is constantly evolving. Staying informed helps you maximize your system's long-term value.
- Software Updates: Keep your inverter and battery management system software updated. Manufacturers frequently release updates to improve performance and add features.
- System Expansion: Consider future energy needs. ANERN offers scalable solutions, allowing you to expand your system with additional panels or battery capacity if your energy demands grow.
- Technology Advancements: While your current system is designed for long-term performance, be aware of emerging technologies that could further enhance your energy independence.
Your Path to Energy Confidence
Completing your solar and energy storage system installation is an exciting milestone. By diligently following this post-installation checklist, you empower yourself with the knowledge and tools to ensure your system operates at its best.
ANERN, with years of experience in solar and energy storage, is committed to providing reliable, scalable energy solutions, from high-performance LiFePO4 batteries to integrated home ESS and versatile off-grid solar solutions. Our focus on quality and innovation helps you achieve true energy independence.
Remember, your system is a dynamic asset. Regular monitoring, proactive maintenance, and understanding its capabilities will help you enjoy clean, reliable energy for decades to come. Welcome to a more sustainable and independent energy future.
Disclaimer: The information provided in this article is for general informational purposes only and does not constitute professional advice. For specific technical guidance or legal advice, consult with a qualified professional.
Table 1: Key Post-Installation Checks and Their Importance
| Checklist Item | Purpose | Frequency | Expected Outcome |
|---|---|---|---|
| Visual Inspection of Components | Identify immediate physical damage or installation errors. | Day 1, then quarterly | No visible damage, secure components. |
| Inverter Status & Readings | Confirm system is powered on and generating power. | Daily (first week), then weekly/monthly | Operational status, no error codes, positive power output. |
| Battery System Status (if applicable) | Verify battery communication, charge, and operating mode. | Daily (first week), then weekly/monthly | Correct SOC, seamless communication with inverter. |
| Monitoring App Access & Data | Ensure remote access to performance data. | Day 1, then periodically | Successful login, accurate data mirroring physical readings. |
| Warranty Activation | Secure long-term protection for your investment. | Within specified manufacturer timeframe (typically 30-90 days post-install) | All product warranties registered and confirmed. |
| Emergency Shut-off Location | Know how to safely power down the system. | Day 1 | Clear understanding of disconnect switch locations and operation. |
The global electricity grid is undergoing significant transformation to support clean energy transitions. HVDC systems, for example, represent about 7% of newly installed transmission systems and are expected to grow, reflecting the need for robust infrastructure to handle increasing renewable contributions. The integration of electric vehicles also promises significant flexibility, encouraging local renewable installations and offering system operators more accommodation for increased variable renewable energy shares. Governments play a role in fostering innovation, with demonstration projects at Technology Readiness Level (TRL) 7 or 8 being crucial for proving new designs and facilitating further investment.
These broader trends underscore the importance of reliable and efficient solar and storage systems at the homeowner level, contributing to a more flexible and resilient energy future. The emphasis on robust grid infrastructure and smart energy management aligns with the benefits homeowners gain from their post-installation checklist.
