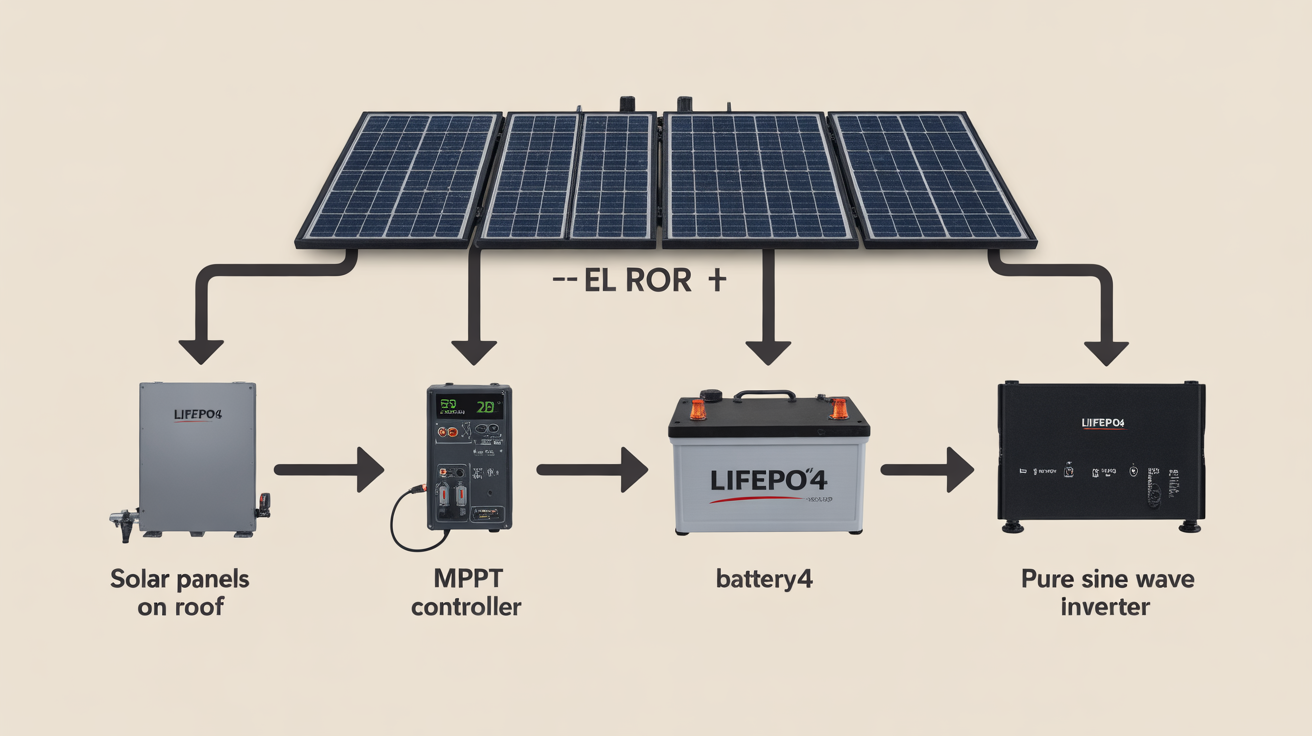
The allure of the open road is the freedom it represents—the ability to explore remote landscapes and wake up to new horizons. Powering that freedom with a reliable 12V solar system transforms the experience, offering quiet, consistent energy without relying on noisy generators or crowded campgrounds. However, planning a solar setup can feel complex. This guide simplifies the process, breaking it down into logical steps to help you design a system that meets your travel needs.

Chapter 1: Sizing Your System: From Power Audit to Panel Selection
Proper planning is the foundation of a successful RV solar power system. Before buying any equipment, you must first understand exactly how much power you need. This prevents overspending on a system that's too large or, worse, being left without power when you need it most.
1.1 The Critical First Step: Your Energy Audit
An energy audit is the process of calculating your total daily electricity consumption in watt-hours (Wh). This is the single most important step in the entire planning process. To start, list every electrical device you intend to use. For each device, find its power consumption in watts (W) and estimate how many hours you'll use it per day. You can usually find the wattage on the device's label or through a quick online search.
Formula: Watts (W) × Hours of Use per Day = Daily Watt-Hours (Wh)
Here is a sample worksheet to guide you:
| Appliance | Power (Watts) | Hours of Use/Day | Daily Watt-Hours (Wh) |
|---|---|---|---|
| LED Lights (x4) | 20W | 5 | 100 Wh |
| 12V Refrigerator | 50W | 8 (cycle time) | 400 Wh |
| Laptop Charging | 65W | 4 | 260 Wh |
| Water Pump | 60W | 0.5 | 30 Wh |
| Total | 790 Wh |
Once you have your total daily watt-hours, you have the foundational number for sizing your entire system. For a detailed walkthrough, see The 12V RV Solar Blueprint: From Energy Audit to Wiring.
1.2 Sizing Your Solar Array
Your solar array's job is to replenish the energy you use each day. To determine the required wattage of your solar panels, you'll use your daily watt-hour total and factor in "peak sun hours." This term refers to the average number of hours per day that the sun's intensity equals 1,000 watts per square meter. This number varies based on your geographic location and the time of year, but a conservative estimate for North America is often 4-5 hours.
Formula: Daily Watt-Hours (Wh) ÷ Peak Sun Hours = Required Solar Panel Wattage (W)
Using our example: 790 Wh ÷ 4 hours = 197.5W. To account for cloudy days and system inefficiencies, it's wise to add a 20-25% buffer, bringing the target to around 250W of solar panels. You can achieve this with various panel configurations, from large rigid panels to flexible options. For more on panel choices, check out Roof Panels vs Portable Suitcases for 12V Van Systems.
1.3 Choosing the Right Solar Charge Controller
A solar charge controller is a vital component that sits between your solar panels and your battery bank. Its primary function is to regulate the voltage and current coming from the panels to prevent overcharging and damaging your batteries. There are two main types: PWM (Pulse Width Modulation) and MPPT (Maximum Power Point Tracking).
- PWM Controllers: These are simpler and less expensive. They work by essentially connecting the panels directly to the batteries and then tapering the charge as the battery fills. They are most effective when the solar panel's voltage is closely matched to the battery's voltage.
- MPPT Controllers: These are more advanced and efficient. An MPPT controller can accept a higher voltage from the solar panels and convert the excess voltage into extra charging current. This technology is particularly beneficial in cooler weather or low-light conditions and can boost energy harvest by up to 30% compared to PWM controllers. They are the recommended choice for systems using high-performance LiFePO4 batteries.
For a deeper dive into sizing your controller, read How to Right-Size RV 12V Solar: MPPT, LiFePO4, Inverter.
Chapter 2: The Heart of Your System: Battery Bank and Inverter
If solar panels are the generators, the battery bank is the heart of your system. It stores the energy collected during the day for use at night or on overcast days. The inverter then makes that stored power usable for your everyday household appliances.
2.1 Selecting Your Battery Bank: The LiFePO4 Advantage
The choice of battery technology is critical for performance, longevity, and safety. While traditional lead-acid (like AGM) batteries have been used for years, Lithium Iron Phosphate (LiFePO4) has become the superior choice for modern RV solar systems. Our focus on high-performance, safe, and reliable LiFePO4 batteries stems from their clear advantages.
LiFePO4 batteries offer a longer lifespan, are significantly lighter, and can be discharged more deeply without damage. An AGM battery is typically only discharged to 50% of its capacity to preserve its health, while a LiFePO4 battery can be safely discharged to 80-90% or more. This means a 100Ah LiFePO4 battery provides nearly double the usable energy of a 100Ah AGM battery.
Comparison: LiFePO4 vs. AGM Batteries
| Feature | LiFePO4 (Lithium Iron Phosphate) | AGM (Absorbent Glass Mat) |
|---|---|---|
| Usable Capacity (Depth of Discharge) | 80-90%+ | 50% |
| Cycle Life | 2,000 - 5,000+ cycles | 300 - 600 cycles |
| Weight | Up to 50% lighter for the same capacity | Heavier |
| Charging Efficiency | ~98% | ~80% |
| Long-Term Cost | Lower due to longer life and no maintenance | Higher due to more frequent replacements |
To size your battery bank, use this formula: `(Daily Watt-Hours ÷ Battery Voltage) × Days of Autonomy ÷ Max Depth of Discharge = Required Amp-Hours`. For more on this trend, see Trend Watch: LFP Drives Safer, Lighter RV 12V Solar Builds.
2.2 The Inverter: Converting DC to AC Power
Your batteries store power as Direct Current (DC), but many common appliances like coffee makers, microwaves, and laptops run on Alternating Current (AC). A solar inverter converts 12V DC power from your batteries into 120V AC power.
There are two types of inverters: Modified Sine Wave and Pure Sine Wave.
- Modified Sine Wave: An older, less expensive technology that can run simple electronics but may cause issues with sensitive devices like modern TVs, laptops, or medical equipment.
- Pure Sine Wave: Produces clean, high-quality power identical to what you get from a wall outlet at home. It is the standard for any serious RV build to ensure all appliances run correctly and without risk of damage.
Chapter 3: System Design and Installation Best Practices
A well-designed system is safe, efficient, and easy to maintain. Paying attention to details like wire size, fusing, and component placement will ensure your system performs reliably for years to come.
3.1 Wiring and System Layout
Using the correct wire gauge (thickness) is crucial to minimize voltage drop and prevent a potential fire hazard. Thicker wires have less resistance, allowing power to flow more efficiently from your panels to your batteries. Always use fuses or circuit breakers on all positive connections to protect your components and wiring from over-current events. A master shut-off switch is also a key safety feature. Planning your layout carefully can prevent common issues. For a list of what to avoid, review 7 Costly Mistakes in RV 12V Solar Layouts—and Fixes and follow a structured plan like the one in 30-Day Roadmap to a Safe 12V Campervan Power System.
3.2 Integrating Alternator Charging
Solar is fantastic, but for true energy security, having multiple charging sources is ideal. Your vehicle's alternator can be used to charge your battery bank while you drive. The best way to do this is with a DC-to-DC charger. This device isolates your house battery from your vehicle's starting battery and provides a proper multi-stage charging profile, which is especially important for LiFePO4 batteries. Learn how to Unlock Silent Power: Combine Alternator Charging and Solar.
3.3 Monitoring Your System
You can't manage what you don't measure. A quality battery monitor with a shunt is an indispensable tool. It acts like a fuel gauge for your battery bank, providing real-time data on your battery's state of charge (SOC), voltage, and the current flowing in or out. This information allows you to make informed decisions about your power usage and understand how your system is performing. To compare options, see this Tool Test: Best 12V Battery Monitors for Vans and RVs.
Chapter 4: Real-World Scenarios and Troubleshooting
Theory is one thing, but performance in the real world is what counts. Your system's output will change with the seasons, and knowing how to adapt and troubleshoot is key to a stress-free experience.
4.1 Planning for Different Seasons
Power planning for a summer trip is very different from planning for winter boondocking. Summer offers long days with the sun high in the sky, making it easy to generate power. Winter brings shorter days and a lower sun angle, which can dramatically reduce your solar generation. For winter travel, consider oversizing your solar array, using tiltable panel mounts to better catch the sun, and relying more on supplemental charging like a DC-to-DC charger. Compare the requirements in What Size 12V Solar Do Campervans Need for Summer Trips? and Case Study: 12V RV Solar for Winter Boondocking, Data Inside.
4.2 Diagnosing Common Issues
If your system isn't performing as expected, don't panic. Most issues are simple to fix. Start with the basics: are the solar panels clean and free from shade? Are all wiring connections tight and free of corrosion? Is the charge controller configured for your specific battery type? A systematic approach can help you identify and resolve most problems quickly. For a detailed guide, refer to Diagnose 12V RV Solar Underperformance: A Step-by-Step Fix.
Your Path to Energy Independence
Planning a 12V solar system for your RV or campervan is an empowering process. By starting with a thorough energy audit, you can accurately size your solar array, battery bank, and supporting components. Choosing high-quality equipment, like efficient MPPT charge controllers and long-lasting LiFePO4 batteries, provides a reliable foundation for your adventures. With a properly installed and monitored system, you can achieve true energy independence and enjoy the freedom of the road, powered by the sun.
---
Disclaimer: This article is for informational purposes only and does not constitute professional electrical or financial advice. Electrical systems can be dangerous. Please consult with a qualified professional for your specific installation needs. The information provided is not an investment recommendation.


Leave a comment
All comments are moderated before being published.
This site is protected by hCaptcha and the hCaptcha Privacy Policy and Terms of Service apply.