


Solar power feels “off” when charging never finishes, the controller jumps between stages, or the battery hits low voltage earlier than expected. Those problems often trace back to one thing: the controller was selected or configured like a lead-acid system. A 12 volt 100Ah lithium battery (often LiFePO4) charges differently. It holds voltage well during use. It also prefers specific charge limits and protections. Dial those in, and the system becomes steady. Daily runtime improves. Charging becomes repeatable.
What Matters Most When Pairing a 12V 100Ah Lithium Battery and Controller?
Pairing works best when the controller is treated like a safety device. The battery has hard limits and the controller has to respect them every single day. If one limit is missed, performance drops fast or protections start tripping.
Battery limits come first. Check the following three items:
- Max charge voltage (often expressed as absorption or charge voltage)
- Max charge current (set by cells and the BMS)
- Cold charging behavior (allowed temperature range or BMS cutoff)
Then confirm the controller can match those limits. A controller that cannot disable equalization, cannot limit current, or cannot handle your array voltage will cause trouble later.
A 12V 100Ah lithium-ion battery also brings a practical advantage. It can accept a charge efficiently and hold a stable working voltage. That helps sensitive loads. It also makes correct settings feel even more important, because the system responds quickly when configured well.
When Is PWM Good Enough, and When Should You Use MPPT?
The controller type decides how much of the panel output becomes usable charging current. That choice also shapes wiring options, especially if panels need to be placed far from the battery bank.
PWM fits simple arrays. It works best when the panel voltage is close to the battery voltage and the cable runs are short. It can work well for small, basic loads.
MPPT fits the setups that many people actually run. It converts extra panel voltage into usable charging current. That helps in these situations:
- Panels wired in series
- Long cable runs from the array to the controller
- Cold mornings with higher panel voltage
- Roof arrays that spend time in partial shade
For many 100Ah lithium batteries, MPPT tends to reach absorption faster and spends less time “hovering” below full. That is why MPPT for 100Ah lithium battery systems is so common in RV, van, cabin, and marine installs.
What PV Voltage Limits Should You Check Before Choosing a Controller?
PV voltage is the silent dealbreaker. A system can look perfectly sized in amps and watts, then shut down because the array voltage exceeded the controller’s limit. This is also the mistake that can damage hardware.
Focus on open circuit voltage (Voc) and your series wiring plan.
What to Verify
- Total string Voc at cold temperatures stays below the controller’s PV input max.
- The array wiring schematic is final before buying the controller.
- Controller PV input rating matches the string design with a margin.
Why Cold Matters
Panel voltage rises as temperature drops. A string that looks safe in warm weather can cross the line in winter. This matters even for a 12 volt 100Ah lithium battery system because PV input voltage is independent of battery voltage.
How to Size an MPPT for a 100Ah Lithium Battery System
Sizing becomes straightforward once you separate the two jobs the controller performs. One side of the controller deals with panel voltage. The other side delivers controlled current into the battery. Each side needs its own check.
PV Input Side
Pick a controller that accepts your planned string voltage with a margin. That decision comes from the previous section.
Battery Output Side
Estimate the output current from the array watts.
Charge controller output amps ≈ Array watts ÷ charging voltage
For LiFePO4, charging voltage during absorption often sits in the low 14V range. Use your battery’s recommended absorption voltage when available. Use a conservative assumption if it is missing.
Example:
- 600 W array
- 600 ÷ 14.2 ≈ 42 A
Now compare that current to your battery’s allowed charge current. Many 100Ah lithium batteries accept strong current, but the exact limit varies by design. If the controller supports a charge current cap, set it to the battery’s limit.
This approach prevents two common pain points:
- A controller that bottlenecks charging on a good sunny day
- A controller that can push the current above what the BMS allows

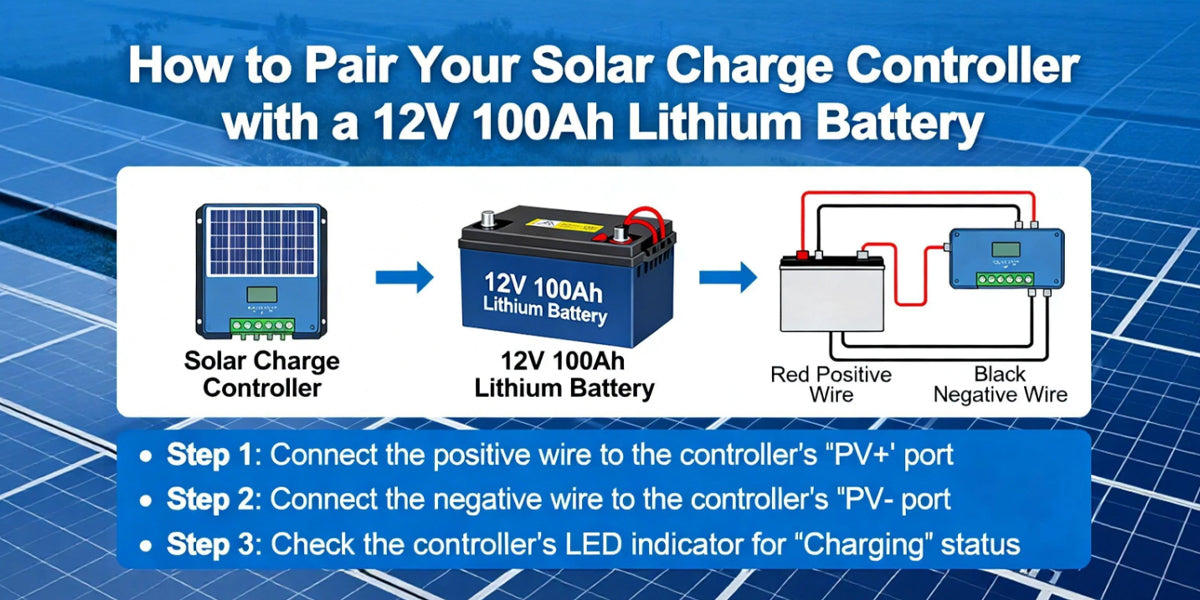
How Do You Wire Fuses, Breakers, and Battery Connections Safely?
Wiring is where safety and performance meet. Clean wiring keeps heat down, reduces voltage drop, and helps the controller “see” the battery accurately. That matters even more with lithium, because charging current can stay high for long stretches.
Protect the Battery and PV Circuits Properly
Use protection devices to guard conductors against short circuits.
- Battery side protection: put a DC-rated fuse or breaker close to the battery positive feeding the controller.
- PV disconnect: add a PV side DC disconnect or breaker so the array can be isolated for service.
- Parallel strings: use proper string protection when required by your wiring layout and local practice.
Reduce Voltage Drop Where It Matters Most
Voltage drop on the controller to battery run can fool the controller and slow charging.
- Keep the controller to battery wiring short.
- Use an adequate wire gauge for the expected current.
- Crimp lugs correctly and torque terminals to spec.
A system can show 14.2 V at the controller while the battery sees less. That can prevent a 12 volt 100Ah lithium battery from reaching a true full charge.
Use a Clean Connection Sequence
Many controllers prefer battery connection first, so the system voltage is detected correctly.
- Connect the battery to the controller first.
- Then connect the PV input.
- Disconnect in reverse order during service.
Avoid Common Field Mistakes
- Loose terminals that heat up under load
- An undersized cable that wastes charging current
- AC breakers used on DC circuits (unsafe and unreliable)
These wiring habits support any solar charge controller for lithium battery use. They also protect the BMS from unnecessary stress events.
Which LiFePO4 Charge Controller Settings Deliver Stable, Full Charging?
Settings are the point where “compatible” becomes “reliable.” Lithium charging can look normal for weeks, even with imperfect settings, then a cold snap or a long absorption hold exposes the weakness. Tight settings keep the battery healthy and keep daily charging predictable. Settings should match LiFePO4 behavior and the battery maker’s limits.
Voltage Targets and Charge Stages
Most LiFePO4 packs land near these typical values for a 12V system:
| Setting | Typical LiFePO4 Range | Why It Matters |
| Absorption voltage | 14.2 to 14.4 V | Reaches full charge without excessive top voltage |
| Float voltage | Low or disabled (often around 13.4 to 13.6 V if required) | Limits time at elevated voltage |
| Rebulk or restart | Near mid 13 V range | Prevents constant cycling from small loads |
Use the battery’s specified value when it exists. Some packs want 14.4 V. Some prefer 14.2 V. The difference can come from the BMS strategy and balancing behavior.
Absorption Time
Lithium typically does not need long hours at high voltage.
- Aim for a short, controlled absorption window.
- Too little time can prevent balancing.
- Too much time can hold the pack high for no benefit.
A practical window is often 30 to 120 minutes, then adjust based on how your battery behaves near full.
Features That Should Usually Be Disabled
These toggles often cause the biggest problems when left on.
- Equalization: OFF
- Temperature compensation: OFF or 0 mV per °C for lithium profiles
These are common LiFePO4 charge controller settings because they were built for lead acid, not for LiFePO4.
Charge Current Limit
Match the controller to the battery’s allowed charge current.
- If the battery allows 50 A, set Max Charge Current: 50 A
- If the battery allows less, cap it lower.
Many users target around half the capacity in amps for daily charging. That aligns well with a 100Ah lithium-ion battery in many practical systems. Still, the battery spec is the authority.
Temperature Safeguards
Cold charging deserves a hard rule.
- Rely on the BMS low-temperature charge cutoff if your battery includes it.
- Add a controller temperature sensor if the controller supports one.
- Use a conservative cutoff if settings are available.
Run a Final System Test to Confirm Safe, Efficient Charging
Take the system into full sun and watch one clean charge cycle. Battery voltage should rise smoothly to your LiFePO4 absorption target, then settle without a long high voltage hold. Charge current should stay within the battery’s allowed limit, and cold weather protections should block charging when needed. If those behaviors look right, the pairing is done. Your solar charge controller can now keep a 12 volt 100Ah lithium battery charging safely, efficiently, and predictably through normal daily use.
FAQs
Q1: Can I charge a 12V 100Ah lithium battery from a controller that only has lead acid presets?
Yes, usually. Use the closest sealed AGM profile, then manually turn off equalization and temperature compensation. Set absorption and float to the battery maker’s values. If manual control is limited, choose a controller with a true lithium profile.
Q2: Should I add an external shunt monitor if my controller already shows amps and volts?
Yes, if you care about the accurate state of charge. A shunt measures real battery current and integrates amp hours, which stays accurate across varying loads. Controller numbers can be misleading because they reflect charging flow, not total battery in and out.
Q3: Can I connect a DC to DC charger and a solar controller to the same 12V 100Ah lithium battery?
Yes, with coordination. Match both chargers to the same absorption voltage, disable conflicting float behavior, and cap combined charge current below the battery’s maximum. Use separate fusing on each charger’s positive lead to prevent backfeeding and fault sharing.
Q4: Do I need a surge protector or lightning protection for small solar lithium systems?
It depends. In storm-prone areas or long outdoor cable runs, add a DC surge protective device on the PV input and bond grounding correctly. For rooftop RV arrays with short runs, good routing and proper grounding often cover typical risk levels.
Q5: Is it safe to leave a 12V 100Ah lithium battery at 100% state of charge for weeks?
No, not ideal. For storage, many LiFePO4 makers recommend parking near 40–60% state of charge and disconnecting loads. If the system must remain active, lower float or use a storage mode to reduce time at high voltage.
